Quantcast
Channel: Kendo UI Blogs
Viewing all 181 articles
Browse latest View live

"Introduction to Kendo UI" from Pluralsight

$
0
0

We, as developers, need resources when it comes to learning a new skill or technology. To complicate matters, each of us employ different techniques to learn. Some developers, for example, prefer to immediately get their hands dirty by writing "hello, world". Others prefer a more traditional approach; learning in a more structured manner, seeing the underlying concepts before the code. As for myself, I've found that sheer brute force is my preferred approach. It usually takes a number of hours, banging my head on the wall until a concept finally sinks in:

But, I digress.

A few weeks ago, we lauched the Kendo UI Dojo; an interactive environment designed to help you get up and running with Kendo UI quickly, no downloads needed. So far, it's been quite popular with helping developers to better understand what Kendo UI is and how it works.

We've worked incredibly hard at building and maintaining the learning resources you need to be successful with Kendo UI. Some examples include this blog, our forums, our new documentation site (available on GitHub at kendo-docs), or the Kendo UI Dojo. Until recently, one of the challenges we had faced was providing an online set of screencasts to help developers walk step-by-step through the fundamentals of application development with Kendo UI.

Enter Pluralsight.

Folks who know me are well aware of my love for Pluralsight. If you haven't heard of them before then you owe it to yourself to check them out. Simply put: Pluralsight has some of the best online training for developers who are looking to improve their skills and increase their understanding. Period. They have over 350 courses, covering a boat-load of different topics, including JavaScript and web frameworks. In fact, last month, Keith Burnell published a course last month featuring Kendo UI! His course, Introduction To Kendo UI features nearly 2.5 hours of Kendo UI goodness, covering widgets, the Kendo UI framework, Kendo UI Web, Kendo UI DataViz, Kendo UI Mobile, and Kendo UI Complete for ASP.NET MVC. Here's a description of the course:

Today, more than ever, users are demanding a rich interactive web experience and developing those types of web applications requires you to have a vast array of tooling in your developer tool belt. This includes MVVM frameworks, validation frameworks and frameworks to handle mobile devices. In this course you will be introduced Kendo UI, an exciting new JavaScript toolset that provides all the tooling you need to deliver fast, rich, responsive and interactive web applications in a single package.

Here's an excerpt from Keith's course entitled, "En-Gauge Your Users with Kendo UI" where he provides a quick overview of building an application that features the Linear Gauge and Radial Gauge of Kendo UI DataViz:

It's an excellent course and one that I'd recommend watching. Of course, you'll have to pay for a subscription but trust me, it's really worth it. Note: They also have free, trials that - in the words of Pluralsight - give you "access to the whole enchilada for 10 days." Courses like these will help short-circuit the time necessary to understand Kendo UI (along with other topics as well).

Check it out!

About the Author
(@JohnBristowe) is a Developer Evangelist with Telerik and is based out of Melbourne, Australia. John enjoys all the meats of our technology stew, hacking on everything from angle brackets to .NET. John's passion lies in modern web standards like HTML5 and CSS3. His website is bristowe.com.


Inheriting From Custom Widgets

$
0
0

I had the privilege this week of attending the DevReach conference in Sofia, Bulgaria. For those of you who are not already familiar, Telerik (the company which makes Kendo UI) originated in Bulgaria. There are offices here where you will find engineers, product managers, marketing, sales, R&D and virtually any other function you can think of.

Sofia is a beautiful city and I always enjoy coming here - especially for DevReach. I was able to talk to quite a few folks during the time of the conference and I always get some great feedback on Kendo UI. One developer that I talked to asked me how to write "controls" using Kendo UI that have features that can be expanded on or used as is. This would be what is commonly known as having a base class where you can define some default properties, methods, ect and then override those as desired.

I've written several articles about creating composite widgets with Kendo UI, A DataSource aware Kendo UI widget and MVVM aware Kendo UI Widgets.

The process for creating your own widget with encapsulated logic is the same as the first post that I wrote, but I had a fun time putting together a proof of concept for this blog post, so lets go over how to do this and create a unique widget that contains some pre-defined logic that you can then either use, or override as you see fit.

The Bootstrap

Everyone loves bootstraps these days, including myself. I love code that gets me up and running. I've listed this before, but lets go over again the fundamentals of what it takes to create a basic Widget that will be available off of the Kendo UI namespace.

Widget Bootrap

(function($) {

    // shorten references to variables. this is better for uglification 
    var kendo = window.kendo,
    ui = kendo.ui,
    Widget = ui.Widget

    var CustomWidget = Widget.extend({

        init: function(element, options) {

            // assign that to this
            var that = this;

            // call the base function to create the widget
            Widget.fn.init.call(this, element, options);

        },

        options: {

            // the name is what it will appear as off the kendo namespace(i.e. kendo.ui.CustomWidget). 
            // The jQuery plugin would be jQuery.fn.CustomWidget.
            name: "CustomWidget",
            // other options go here
            ...
        }

    });

    ui.plugin(CustomWidget);

})(jQuery);

Create The Widget

The widget that I create here will be VERY loosely based on what the developer who I spoke to was asking me about.

It's a textbox, a label and a checkbox. The textbox has a default change event and so does the checkbox. These might get used over and over and you wouldn't want to have to specify the base functionality for these events every time you used one. In this tutorial, we will specify some base events and then expose the ability to expand on those features by inheriting from this widget. Here is what the basic widget looks like. Whatever you type in the textbox becomes the text of the label. Clicking the checkbox will toggle the background color.

Not terribly impressive, but we need a starting point. Here is the code that makes the complete widget. I'll be going through what all of this dones.

The first step to recreating this is to build the UI. To do that, I specify a _templates object which contains the templates needed to create the 3 HTML components that make up this control.

Specifying Templates

_templates: {
    textbox: "<input class='k-textbox' placeholder='#: placeholder #' type='text' id='#: inputId #' value='#: labelId #'>",
    label: "<label for='#: inputId #' id='#: labelId #' style='display: inline-block; width: 200px; margin-left: 20px;'>#: labelText # </label>",
    checkbox: "<input type='checkbox' # if (data.checked) { # checked='checked' # } #>"
}

You might have noticed that the templates are assuming we are going to pass some data in. This will ultimately be the options object. Lets add the necessary properties to the options object that our template will be expecting. Even if we aren't going to use it, we still need to specify it in the options object and at least give it a default value.

Default Options Values

 options: {
    name: "CustomInput",
    labelText: "Please Enter Your Name...",
    inputText: "",
    checked: false,
    placeholder: "Enter Name",
    toggleColor: "#9BF49D"
},

Here's the breakdown of what they are all going to tell us.

  • name Used by Kendo UI to know what the Widget is called so we can use $("#someSelector").kendoCustomInput();
  • labelText The default text to be shown in each Label.
  • inputText The default text to have in the TextBox (or input for you HTML purists out there).
  • checked Whether or not the CheckBox portion of this control will be checked.
  • placeholder This is something that is only supported in more current browsers, but we can add it in as a bonus for browsers where. it will work. This is the watermark text that appears in the textbox before you type something.
  • toggleColor The color to change the background to when the checkbox is changed. That default hex value is a light green.

The next thing that we need to do is to turn all of these templates into actual HTML UI components by passing the objects object through them. I extract all of this logic into a private _create function. We try to keep the init functions as skinny as possible, so extract all of your logic into private methods that are prefixed with an underscore.

We are also going to add default change events for the textbox and the checkbox.

Create Function

// this function creates each of the UI elements and appends them to the element
// that was selected out of the DOM for this widget
_create: function() {

    // cache a reference to this
    var that = this;

    // set the initial toggled state
    that.toggle = true;

    // setup the label
    var template = kendo.template(that._templates.label);
    that.label = $(template(that.options));

    // setup the textbox
    template = kendo.template(that._templates.textbox);
    that.textbox = $(template(that.options));

    // setup the textbox change event. wrap it in a closure so that
    // "this" will be equal to the widget and not the HTML element that
    // the change function passes.
    that.textbox.change(function(e) { 
      that._inputChange(); 
    });

    // setup the checkbox
    template = kendo.template(that._templates.checkbox);
    that.checkbox = $(template(that.options));

    // setup the checkbox change event. wrap it in a closure to preserve
    // the context of "this"
    that.checkbox.change(function(e) { 
      that._checkChange(); 
    });

    // append all elements to the DOM
    that.element.append(that.textbox)
                .append(that.label)
                .append(that.checkbox);

}

A Note On Lexical Scoping

Lexical scoping means that a function remembers its values even after it executes. In JavaScript, you can reset a variable's value outside of a function and the value of the variable will be changed inside the function as well. This can be really frustrating. The same laws apply to the this object. There are certain tricks that developers have come up with to make sure that the variable values are preserved. One of these ways is to use a closure.

Notice that each of the change events is wrapped in a function (or closure). This is so that I can pass that as the context of this in the function. There are several tricks for setting the context of this. Using closures is one way, but be sure to check out the jQuery $.proxy method and the JavaScript call and apply functions.

Widget Creation

Now that this much is done, we can create the widget by calling the _create method in the init function.

Calling _create In init

init: function(element, options) {

    // assign that to this to reduce scope confusion
    var that = this;

    // base widget initialization call
    Widget.fn.init.call(this, element, options);

    // creates the UI and appends it to the element selected from the DOM
    that._create();
}

Add default a event for the CheckBox which will change the background color. This is a private method, so prefix it with an _.

Default CheckBox Change Event

// the event that fires when the checkbox changes
_checkChange: function() {
  var that = this;

  // check the toggle value
  if (that.toggle) {
    // change the background color to the specified one on the
    // options object
    that.element.css("background", that.options.toggleColor);
  }
  else {
    // toggle it back to white
    that.element.css("background", "#fff");
  }
  // flip the toggle
  that.toggle = !that.toggle;
}

Now the control will toggle the background color when you select and de-select the checkbox. Add a method for the textbox (or input) to change the label to whatever value is in the textbox.

Change Value Of Label To TextBox Value

// the event that fires when the textbox changes
_inputChange: function() {
    var that = this;
    that.label.text(that.textbox.val());
}

At this point, you would have a basic widget that you could initialize by selecting a DOM element and calling kendoCustomInput

Custom Input Widget

<div id="customInput"></div>
<script>
    $("#customInput").kendoCustomInput();
</script>

Overridding The Defaults

When I initially wrote this widget, I was using options objects to pass in overriden events. In talking with the team, this is a bad idea. You should instead do one of two things.

  1. Add option properties that you can respond to (i.e. background color)
  2. Override this widget with a new one to change/inherit the default events

We might want to toggle the background color AND disable the textbox when the checkbox changes. To do this, we need to create a new widget that extends the first one.

Create the new widget just like the first, but this time extend the CustomInput class. You will see that in order to call the base _checkChange method, you need to reference it off the prototype - also known as the base object.

Create CustomInputDisabled Widget

// create a new widget which extends the first custom widget
var CustomInputDisable = CustomInput.extend({

  // every widget has an init function
  init: function (element, options) {

      // cache this
      var that = this;

      // initialize the widget by calling init on the extended class
      CustomInput.fn.init.call(that, element, options);

  },

  // handle the _checkChange event.  This is overriding the base event.
  _checkChange: function() {

     // cache the value of this
     var that = this;

    // disable the textbox first
    if (!that.textbox.is(":disabled")) {
        that.textbox.attr("disabled", "disabled");
    } else {
      that.textbox.removeAttr("disabled");
    }

    // this calls the base method from the CustomInput widget.  If you didn't want
    // to call this, you would omit this line.  then the textbox would be disabled, but
    // the background color would not change.
    CustomInput.prototype._checkChange.call(this); // call the base method
  },
  // all options are inherited from the CustomInput widget. This just sets a new name
  // for this widget
  options: {
    name: "CustomInputDisable"
  }
});

// add this new widget to the UI namespace.
ui.plugin(CustomInputDisable);

More Functionality

You are probably going to want to take this further and look at using DataSources and MVVM. For that, I suggest reading my prior blog posts on how to make your widget DataSource Aware and MVVM Aware.

You can build your own widgets using Kendo UI, or simply encapsulate settings for a single widget. You may have a grid with some very extensive settings. Simply extend the grid base widget and set the default options. Now you have your own grid with your settings that you can re-use over and over without having to reconfigure.

Checkout the code from today's tutorial in the Plugins GitHub Repo.

About the Author
is a web developer living in Nashville, TN. He enjoys working with and meeting developers who are building mobile apps with jQuery / HTML5 and loves to hack on social API's. Burke works for Telerik as a Developer Evangelist focusing on Kendo UI. Burke is @burkeholland on Twitter.

Icenium + Kendo UI = Awesome

$
0
0

Today is a big day for Team Telerik (makers of Kendo UI)! After years of planning and production, today marks the official release of our newest product, Icenium.

And it's awesome.

Icenium is the industry’s first end-to-end, Integrated Cloud Environment (ICE), designed to revolutionize the development of hybrid mobile apps. It combines a powerful set of development tools, mobile simulators, and cloud services in an integrated package that makes it easy for anyone to jump-in to mobile app dev. Today's release ships both the desktop PC development client (Graphite) and the browser-based development client (Mist), along with a companion app for iOS that assists with app development (Ion).

If you did not get to check-out Icenium during the private beta (or even if you did), you've got to check it out today. Right now!

For Kendo UI fans and customers, today's release is interesting for a couple of reasons:

  1. Icenium is an amazing tool to use for Kendo UI Mobile development, and
  2. Icenium Mist is actually built using a lot of Kendo UI Web!

Kendo UI Mobile in Icenium

Kendo UI Mobile and Icenium were made for each other (literally). As this audience should know, Kendo UI Mobile is a collection of HTML5 and JavaScript widgets designed to help developers build native app experiences using web standards. Kendo UI Mobile is unique in its ability to automatically adapt to different mobile platforms, precisely matching the native UX of platforms like iOS and Android. It's the fastest way for developers to build apps that reach the largest number of people. Apps built with Kendo UI can be deployed via the mobile browser or packaged with tools like Cordova and deployed via traditional App Stores.

If you elect to package a Kendo UI Mobile app, normally that means a number new challenges:
  • You've got to download a packaging framework (like Cordova)
  • You've got to setup the Cordova app shells for each target platform
  • You've got setup different IDEs (like Xcode and Eclipse)
  • (And if you're on Windows) You've got to get a Mac to build apps for iOS

With Icenium, all of that hassle goes away.

In an Integrated Cloud Environment, everything from your files and projects to your build tools and frameworks are ready to go wherever and whenever you are. Simply open Icenium, do some development with Kendo UI Mobile, and deploy your app to iOS and Android devices. All of the normal complexity associated with hybrid apps is abstracted away to the cloud.

And since Icenium is from Telerik, we've gone one step further and included access to Kendo UI Mobile in every Icenium subscription! There's even a default project template that can have you up and running with Kendo UI Mobile dev in seconds. More on this special access to Kendo UI in a minute.

Kendo UI in action in Mist

The Icenium Mist development client is a super helpful tool. It gives you access to all of your Icenium projects in any capable HTML5 browser, and it includes many of the Icenium tools (code editor, project build, version control, and more). 

It's also built using Kendo UI Web!

If you look closely, you'll see that the Mist client is using many of the Kendo UI Web widgets, including Splitter, Treeview, TabStrip, Menu, Upload, and ListView. It's also using pieces of the Kendo UI framework, like MVVM, under the covers to provide a modern, responsive, and cross-browser ready HTML5 tool.

What does this mean to you? Two things:
  1. This is some serious dog fooding. Having an internal team at Telerik consume Kendo UI to power such an important, customer-facing piece of Icenium only helps make Kendo UI a better product. All of the feedback and lessons we learn from supporting Icenium go directly in to make Kendo UI a better, faster toolset for your next HTML and JavaScript project.

  2. This is a great "reference" implementation of Kendo UI Web. If you've ever wanted to see how some seriously talented engineers would use Kendo UI Web to build a modern web-based interface, here's your chance to "View Source" and see exactly how it's done.

Mobile License Details

One of the cool things about Icenium, as mentioned previously, is that it includes access to Kendo UI Mobile 

out of the box. This access is usable for any project you develop using Icenium, and it gives you full access to all of Kendo UI Mobile. It is not a complete unrestricted license, though.

If you want access to Kendo UI's professional support, you still need to purchase a normal Kendo UI Mobile ($199) commercial license. That license will give you support, access to incremental builds, and a royalty free license you can use in any of your projects.

Bottom line: If you've already got a Kendo UI Mobile license, you're good to go! If you decide to subscribe to Icenium and use Kendo UI Mobile, that's awesome! If you want the benefits of a full license (like support), though, consider upgrading to a Kendo UI Mobile license purchase.

Next Steps

There's really only one thing left to do: go try the official release of Icenium today!

You should also take a couple of minutes and watch the new "Introducing Icenium" video. You might spot my cameo in there in a couple of places. We hope you enjoy Icenium as much as we do. Stay tuned for much more coverage of Icenium and Kendo UI working together in the coming months.

About the Author
is an avid HTML5, CSS3, and JavaScript advocate, and geek about all things web development. He is an active speaker and author, helping developers around the world learn and adopt HTML5. Todd works for Telerik as VP of HTML5 Web & Mobile Tools, where his current technical focus is on Kendo UI. Todd is @toddanglin on Twitter.

Using Kendo UI With MVC4, WebAPI, OData And EF

$
0
0

This is a quick guide for using ASP.NET MVC4 WebAPI, OData, and Entity Framework as a remote data source for Kendo UI, as well as performing some operations like filtering on the server side.

(If you just want to copy/paste some JavaScript that works, with no explanation as to why it works, then just skip to the very bottom.)

Kendo’s DataSource is a great way to automatically read data from a remote source. One important thing to keep in mind is that the Kendo DataSource is intended to work with a variety of data sources. WebAPI is just one way to get data to your Kendo widgets. Since Kendo strives to support multiple sources, there are bound to be issues with certain services when they aren’t all 100% compatible. This is the case with WebAPI And OData.

Create a WebAPI project.

I started by using the data model from Microsoft’s MVC Music Store sample project. If you don’t have your own existing MVC4 project to work with, you can use MVC Music Store by downloading the source from http://mvcmusicstore.codeplex.com/

Add Kendo UI Web.

Now lets add Kendo UI. You can download Kendo from http://www.kendoui.com/ however if you have not purchased Kendo, and just want to try it out, you can add it through NuGet (search for “kendouiweb”), or you can just include it from the CDN. See: http://docs.kendoui.com/getting-started/javascript- dependencies#cdn

Using the default WebAPI controller.

For my examples, I will be using a WebAPI controller named “AlbumsController”, which is simply:

Albums Controller

public class AlbumsController : ApiController
{
    // GET api/Albums
    public IEnumerable Get() 
    {
        db.Configuration.ProxyCreationEnabled = false;
        var albums = db.Albums;

        return albums.AsEnumerable();
    }
}


We can test our controller by browsing to “/api/Albums” and seeing that it returns all albums as XML. In my example, the MVC Music Store contains several hundred albums, so this is a large list.

So lets see how we can bind to this in a Kendo DataSource:

The HTML page that I will be using contains a single element in its body:

<input id="albumSearch"/>


I am going to turn this into a Kendo UI AutoComplete widget, and use it to search for albums by their title.  I do this using the JavaScript:

Create The AutoComplete

$(document).ready(function() {
    var dataSource = new kendo.data.DataSource({
       transport: {
           read: {
               url: "/api/Albums"
           }
       } 
    });

    $("#albumSearch").kendoAutoComplete({
        dataSource: dataSource,
        dataTextField: "Title",
        minLength: 3
    });
});


My AutoComplete is configured to show the filtered options when there are at least 3 characters entered. This means that the DataSource will not be asked to read the WebAPI URL until we type the 3rd character into the AutoComplete textbox.

Our DataSource is simply set to read from our AlbumsController’s GET method.

Not surprisingly, this works as expected visually:

autocomplete

Now, lets take note of some things that happened here;

  1. When I typed the 3rd letter, Kendo made the request to the URL, seen in the dev tools network activity.

  2. If I continue to type in the box or clear the input and type something else, the URL is NOT queried again. This is because the filtering is happening client-side (this is configurable. read on!).

  3. The result is now JSON. When we manually browsed to that URL, we got XML instead. WebAPI inferred the format from the request header.

  4. Kendo actually passed some parameters in our request query string:

Query String Parameters

api/Albums?filter%5Blogic%5D=and&filter%5Bfilters%5D%5B0%5D%5Bvalue%5D=the&fil
ter%5Bfilters%5D%5B0%5D%5Boperator%5D=startswith&filter%5Bfilters%5D%5B0%5D%5B
field%5D=Title&filter%5Bfilters%5D%5B0%5D%5BignoreCase%5D=true


This translates to:

Query String Parameters Translated

filter[filters][0][field]=Title
filter[filters][0][ignoreCase]=true
filter[filters][0][operator]=startswith
filter[filters][0][value]=the
filter[logic]=and


However if we look at the actual JSON response, the very first album returned contained: {"Title":"...And Justice For All"} so WebAPI is ignoring these query string parameters. It is NOT applying filtering (but most of the rest of this article will deal with making it do the filtering).

If this is what you want, then hey, great! However, I doubt it is. Lets imagine for a moment that this was a real music store album listing. How many albums do you think they have? A few million maybe? (The new Xbox Music service claims 30 million titles!) Would you REALLY want your server to send ALL of those to EACH client browser? No, I didn’t think so. This default “return them all and filter client side” works great for small lists, but is not practical for a lot of real-world applications.

So what can we do about it?

Add OData support.

We want to let the server handle the filtering for Kendo. We will do this using OData.

OData will let us send query parameters over the query string. For example, adding “?$top=5” to your URL would tell OData to only return the first 5 results. So, lets make sure WebAPI isn’t actually doing this already. In your browser, navigate to your api, and include the $top parameter:

top-without-odata

I collapsed some of the Album elements, and you can sure tell it is returning more than the top 2 results.

Now we need to add OData support to WebAPI. The story with WebAPI and OData is a bit confusing. Some limited OData-like support was actually built-in to WebAPI for the preview releases of MVC4. However, this was pulled out for the RTM version. There is still a large number of people out there that believe that WebAPI is out-of-the-box a fully functional OData provider. It isn’t. Instead of building OData support into the RTM release, Microsoft decided to release it in an out-of-band NuGet package.

So in the NuGet console, lets add this package. We also need to modify our GET method within the WebAPI controller to:

Install OData Nuget Package

Install-Package Microsoft.AspNet.WebApi.OData -Pre

Modify GET Method

[Queryable]
public IQueryable Get()
{
    db.Configuration.ProxyCreationEnabled = false;

    var albums = db.Albums;

    return albums;
}


We did 2 things here:

  1. Added the [Queryable] attribute to the method, which indicates that it will be OData queryable.

  2. Changed the method to return an IQueryable instead of an IEnumerable.

Now let’s try that URL with $top=2 again:

top-with-odata

Awesome! Well don’t get too excited too quick. There are more bumps in the road! Note the “-Pre” parameter you had to use in NuGet? That is because this is a pre-release version of OData support for MVC4. This means it isn’t 100% complete yet. There are some features of OData that are not supported (yet). Unfortunately, some of these unimplemented features are ones that Kendo wants, so we are going to have to work around some things. But we will get to that…

Let Kendo use OData

Remember those filter parameters that Kendo added to our URL query string before? Yeah, well those aren’t formatted as OData parameters. We need to tell Kendo to use OData, by setting the "type: 'odata'” property on the data source:

Specify OData For DataSource

var dataSource = new kendo.data.DataSource({
    type: 'odata', // <-- Include OData style params on query string.
    transport: {
        read: {
        url: "/api/Albums"
        }
    }
});


Lets try our AutoComplete now:

1-kendo-odata

Uh oh, this isn't good. WebAPI tells us: "The query parameter '$callback' is not supported."

Look at the parameters Kendo is now sending to our WebAPI controller:

/api/Albums?%24callback=jQuery17207543195712677954_1350180979161&%24inlinecou
nt=allpages&%24format=json&%24filter=startswith(tolower(Title)%2C%27the+%27)


(side-note: "%24" in the query string is an escaped dollar-sign "$", which comes before each OData parameter.)

What is happening here is that it is trying to do a "JSONP" style request, and tell the WebAPI what to use as the callback. Unfortunately, WebAPI OData doesn't support this.

Dealing with the $callback parameter.

So what are we to do? Well, we have 2 options:

1) If you are querying your own data, and don't need to do a cross-domain request, we can just not use jsonp. To do this, we just tell Kendo the dataType for the read operation is "json".

Tell Kendo UI To Use JSON

var dataSource = new kendo.data.DataSource({
    type: 'odata', // <-- Include OData style params on query string.

    transport: {
        read: {
            url: "/api/Albums",
            dataType: "json"; // <-- The default was "jsonp".
        }
    }
});


If you re-try the auto complete at this point, the parameters now sent to the server are:

/api/Albums?%24inlinecount=allpages&%24format=json&%24filter=startswith(tolow
er(Title)%2C%27the+%27)

So we got rid of the jsonp callback parameter that was causing trouble.

2) If you do need to use JSONP to do a cross-domain request, then you will need to add support for that parameter to WebAPI, which is beyond the scope of this article. (Sorry! Maybe I will make a follow-up eventually… or MS will finish implementing OData…)

Dealing with the $inlinecount parameter.

If you try your auto complete now with JSON instead of JSONP, you will see a new error:

2-kendo-odata

So now WebAPI OData is telling us "The query parameter '$inlinecount' is not supported." Well, it seems the $inlinecount parameter isn't supported either. Why does Kendo want this? What that parameter does is tell OData to include a count of all items. This comes into effect when setting up paging. For example, if we were doing a Grid and wanted pages of 20, in order to render the grid's paging controls, we would need to know how many pages we could have. The $inlinecount parameter gives us this ability. When that parameter is included, OData is supposed to wrap the result in another object that includes the count, which would look like:

{
    "Results": [
        /* ... normal results json goes in here ... */
    ],
    "Count": 64
}


So if we were doing pages of 20, and had a full OData implementation on the server, we could request the first page by doing:

http://wherever/Albums?$take:20&$inlinecount

Which would return our first 20 items, plus the count (lets assume 64 items) which would let us know that we are displaying 1 through 20 of 64 items, and that we will have 4 pages.

Well, since OData in WebAPI doesn't support this, we need to do something…

Again we have 2 options.

1) Do we really need the $inlinecount? If you are not doing paging in your UI, like in our AutoComplete example, I don't have "pages" of AutoComplete items, so I don't really need $inlinecount. We can remove that parameter from the parameters sent to the server. Kendo will let you edit the entire parameter map before it is sent to the server, so we can just remove the $inlinecount by doing:

Remove Inline Count Parameter

transport: {
    read: {
        url: "/api/Albums", // <-- Get data from here
        dataType: "json" // <-- The default was "jsonp"
    },
    parameterMap: function (options, operation) {
        var paramMap = kendo.data.transports.odata.parameterMap(options);
        delete paramMap.$inlinecount; // <-- remove inlinecount parameter
        delete paramMap.$format; // <-- remove format parameter

        return paramMap;
    }
}


(Note that I am also removing $format here. That is another OData parameter that WebAPI OData doesn't support yet, but I wanted to demonstrate a different error and had to include that in the code.)

Now let's try the auto complete again:

3-kendo-odata

Yikes! What is that JavaScript error!? Don't panic, we can fix this! Kendo doesn't really know that you removed the $inlinecount parameter manually. It still expects the results to be "wrapped" in that JSON object with .Results and .Count properties. We need to do a little extra work to override Kendo's default behavior, and skip unpacking the result and count by changing the "schema" property of the data source:

Set Schema

var dataSource = new kendo.data.DataSource({
    type: 'odata', // <-- Include OData style params on query string.
    transport: {
        read: {
            url: "/api/Albums", // <-- Get data from here.
            dataType: "json" // <-- The default was "jsonp".
        },
        parameterMap: function (options, type) {
            var paramMap = kendo.data.transports.odata.parameterMap(options);
            delete paramMap.$inlinecount; // <-- remove inlinecount parameter
            delete paramMap.$format; // <-- remove format parameter

            return paramMap;

        }
    },
    schema: {
        data: function (data) {
            return data; // <-- The result is just the data, it doesn't need to be unpacked.
        },
        total: function (data) {
            return data.length; // <-- The total items count is the data length, there is no .Count to unpack.

        }
    }
});


So let's try the auto complete again and see the result:

4-kendo-odata

Notice that our JSON returned from the server only contains 2 results; the same 2 that are displayed in the auto complete drop down! We are now filtering server-side and showing the results!

Stop Client-Side Filtering

Ready to take on the world with your new found abilities? Well, not so fast, slick… Clear out your AutoComplete text box and try something else without refreshing the page. For example, search for "the" then clear that and search for "best". Notice a problem? Remember back at the beginning when we were pulling the entire data set, and Kendo was smart enough to do the filtering client side, and not re-hit the server? Yeah, well, it is still doing that. Now it is client-side filtering our server-side filtered results, instead of re-hitting the server for new filtered results. We need to explicitly tell Kendo that we are doing filtering server-side, with the data source's serverFiltering and serverPaging properties:

Turn Server-Filtering On

var dataSource = new kendo.data.DataSource({
    serverFiltering: true, // <-- Do filtering server-side.
    serverPaging: true, // <-- Do paging server-side.
    ...


Now Kendo will re-query the server whenever it needs new filtering or paging!

Dealing with the $format parameter.

You might have noticed earlier when I started removing the $inlinecount parameter, I also removed $format. If you don't remove it, then WebAPI OData will error on that too. It would normally be used to specify the format, for example XML or JSON. However it is already JSON without the $format parameter, and that is fine. Kendo likes JSON anyway, so we don’t really need this parameter at all.

Final thoughts. Is there a better way?

If you are keeping score, we covered 3 OData parameters that Kendo uses by default that WebAPI OData's implementation doesn't yet support. Is there a better way to handle all this? Well, that, like so many things, its situational. If you are starting a completely new project, and just want a way to serve data to a Kendo app, then WCF Data Services is actually much more capable and comes with a more complete OData implementation. (disclaimer: at the time of this writing, I haven't actually tried this against WCF Data Services to see if it supports $callback, $inlinecount, and $format).

Also, if you do some searching, there are write-ups out on the web on adding support for all 3 of these OData parameters to WebAPI; so if you are feeling adventurous, you can try adding them all yourself and removing the additional Kendo DataSource configuration that I had to do to work around them. In fact, if you want real paging to work, you will probably have to at least add support for $inlinecount to WebAPI.

Personally, I really hope there are enough people out there that want to use OData with WebAPI that MS will finish the implementation, and include these 3 parameters. However, until then, hopefully this post got you the information you needed to get started with KendoUI + WebAPI + OData.

Oh, and my final JavaScript from this example, all put together, is:

Complete Code

$(document).ready(function() {

    var dataSource = new kendo.data.DataSource({
        serverFiltering: true, // <-- Do filtering server-side
        serverPaging: true, // <-- Do paging server-side
        type: 'odata', // <-- Include OData style params on query string.
        transport: {
            read: {
                url: "/api/Albums", // <-- Get data from here
                dataType: "json" // <-- The default was "jsonp"
            },
            parameterMap: function (options, type) {
                var paramMap = kendo.data.transports.odata.parameterMap(options);

                delete paramMap.$inlinecount; // <-- remove inlinecount parameter.
                delete paramMap.$format; // <-- remove format parameter.

                return paramMap;

            }
        },
        schema: {
            data: function (data) {
                return data; // <-- The result is just the data, it doesn't need to be unpacked.
            },
            total: function (data) {
                return data.length; // <-- The total items count is the data length, there is no .Count to unpack.

            }

        }
    });

    $("#albumSearch").kendoAutoComplete({
        dataSource: dataSource,
        dataTextField: "Title",
        minLength: 3
    });
});

About the Author
is a Lead Developer for the Telerik Services team in Hudson, OH. He enjoys promoting Software Craftsmanship at local user groups, and focusing on Microsoft technologies and the .NET stack. You can follow Jeff on Twitter @CodingWithSpike

Is HTML5 hype justified or not?

$
0
0
We had the same question. We read the available research online and often found it conflicting. Some analysts are HTML5 bulls; some are bears. Clearly, the Kendo UI team has its own (bullish) opinions on HTML5, but like any good student of the industry, we want to make sure those opinions are in-touch with the heartbeat of the developer community.

Not satisfied with the available data, we gathered our own via a new survey that collected responses from more than 4,000 developers! If you want it done right, you've got to do it yourself, they say. Although the survey investigated a number of issues, we were particularly interested in these three:

1. HTML5 adoption trends
2. HTML5 importance to developers

3. Impact of outside influences on HTML5 (such as Facebook’s mobile fiasco)

The data is compiled and the results are quite interesting! If you want the full results, just download the free PDF from our HTML5 Adoption Survey 2012 page. It's pretty (lots of pictures). To whet your appetite, here is a quick sample of some of the survey's findings:.

• Most developers (94%) are already actively developing with HTML5, or plan to do so by the end of 2012 (which is almost here)!
• Despite major improvements in modern browsers and increased standardization, browser fragmentation continues to be a major concern for developers (71% are "concerned")
• Facebook’s decision to rewrite their HTML5 mobile iPhone app using mostly native code has had minimal impact on adoption or attitude towards adoption of HTML5. Developers seem to have shrugged it off.

Check-out the complete survey results for all the details and analysis. For example, you can learn whether developers prefer the W3C ("slow and steady") or WHATWG ("living standard") approach to evolving the HTML5. The answer might surprise you!

If you would like your opinions to be included in the next edition of the Kendo UI Global Developer Survey, please sign up for Kendo UI monthly newsletter (see survey page) (no spam, we hate it too!) and watch for the next survey in 2013. 'Til then, enjoy the survey results. Share them with a friend or a boss and let us know what you think in the comments!

About the Author
is a Marketing Director at Telerik and is based in Toronto, Canada. A geek at heart, Sasha works with HTML and JavaScript developers worldwide and loves learning from passionate people. You can follow Sasha on Twitter @k_sasha.

Kendo UI Documentation and YOU!

$
0
0

Did you know that you can file issues and even make edits to the official Kendo UI documentation? Read on to find out how…

As you’re all no doubt aware, as a part of our Summer release in July, we rolled out a new documentation experience in the form of docs.kendoui.com, an all-in-one site for API documentation, getting-started guides, tutorials and more.

As I stated in the launch Webinar, the move to a new site was another step in the evolution and improvement of the Kendo UI Documentation, as opposed to an “ok, we’re done now!” statement. Kendo UI is still very young (it’s our first birthday already, can you believe it?), but we’ve grown fast, both in terms of customer adoption and features included in the various Kendo UI offerings. With this rapid growth comes a bevy of challenges, not the least of which is making sure that our documentation remains “up to snuff” (or gets “up to snuff,” depending on your point of view) as we grow. To keep pace, we had to kick off some drastic changes to our pre-Q2 docs.

Improving the Kendo Docs Authoring Process

After taking a look at our existing documentation, we grouped needed improvements into three categories:

  1. The Authoring Process
  2. The Experience
  3. The Content

Our old process was time-consuming and painful, and we knew that the very first step needed to “unlock” improvements to both the experience and the content was to improve the authoring process. With this in mind, the largest shift that we made for the Kendo UI documentation last quarter was to move to a totally new authoring process. This change is mostly invisible to you, our customers, but it was absolutely needed for us to quickly evolve our content based on your needs.

As a part of that shift, we decided to author all of the Kendo UI documentation in Markdown (which we are all well-versed in and comfortable with… this very post was drafted in Markdown, for instance) and then generate HTML documents for the new docs.kendoui.com site based on the Markdown content.

The beauty of this setup, in our opinion, is that we can quickly author and modify docs in any text-editor, with no hassle whatsoever. Our docs are versioned in Git, so we get the same level of change tracking and repository management that we already utilize with Kendo UI itself. The end result of this move is easier authoring of docs. And easier authoring means more frequent updates, more docs and the ability to more quickly fix errors and respond to requests for additional content. That’s number three in the list above, and though we’re still in the early phases of having the needed capacity to keep our docs moving and evolving as fast as you need them to, we’re happy that the process itself is ready to respond as we do.

How You Can Help Us Improve the Docs

Of course, as interesting as this “behind the scenes” look at the docs process might be to you, it doesn’t make for a very worthwhile blog post by itself. Rather than continue the navel-gazing, let’s talk about what the improvements to the authoring process mean to you. Specifically, I want you to know that you can file issues and even make edits to the Kendo UI documentation yourself.

I mentioned already that our docs are versioned with Git, just as Kendo is. When we decided to keep our docs in Git and, thus, on GitHub, we also decided to make the repository public and release its contents under an MIT License. The result is the kendo-docs repository, which I encourage you to check out if you haven’t already. Not only can you find the current content of docs.kendoui.com here, but we also maintain branches for as yet unreleased or Beta features.

In addition to making our docs public, the move to GitHub means that you can help us make the docs better in one of two ways. You can either:

  1. File an issue; or
  2. Make some edits and send us a pull request. (we love pull requests!)

Instructions for both can be found in the Readme for the kendo-docs repo.

No matter how you choose to engage with our docs, we want the authoring process to be more transparent, and that includes giving you a place to tell us what’s missing or incorrect. When you’re working with Kendo and you find something that’s incomplete, confusing or just outright missing, tell us! With such a quickly-evolving framework, oftentimes we don’t see the holes unless you wave them in our faces. Even if you’d rather not propose a fix in the form of a pull request, we’ll gladly accept an issue for the needed improvement.

Where We Go From Here

As I stated above, we look at docs evolution in three ways. This post, and our move to GitHub is about the first, but that doesn’t mean that we’re ignoring the other two. We’re in the process of scaling up our content engine as we speak, and we’ve also been hard at work over the last couple of months on improvements to the experience at docs.kendoui.com. This includes things like adding grouped autocomplete functionality to the site search, added a related documents sidebar to the left nav, and UX improvements to our API docs pages. These will be going live as they are ready in the coming weeks, and we hope that you not only like them, but that they continue to improve your experience with our docs. If not, you know where to go to tell us!

About the Author
(@BrandonSatrom) is Program Manager for Kendo UI and is based in Austin, TX. A unapologetic lover of the web, Brandon loves to talk about HTML, JavaScript, CSS, open source and whatever new shiny tool or technology has distracted him from that other thing he was working on. Brandon loves writing and speaking and loves hanging out with and learning from other passionate developers, both online and in person. He blogs on occasion at UserInExperience.com

UglifyJS 2.0 And Kendo UI

$
0
0

Today marks the release of the second version of UglifyJS. If you aren't familiar with Uglify, its a JavaScript library that minifies JavaScript. It's probably the most widely used minification tool for JavaScript in the community, based on it's speed and reliability for producing compact error-free minified code.

We have been using UglifyJS since the very beginning of Kendo UI.

A Glance At Minification

If you aren't familiar with the term "Minification" as it applies to JavaScript, it's the process by which a few things are done to JavaScript source files. Namely the following:

  1. All files are combined into one large file
  2. Whitespace and comments are removed
  3. Local variable names are renamed to single characters

var myLongButMeaningfullVariable = "foo";

// when minified becomes...

var a="foo";


UglifyJS is the "compiler" that traverses the JavaScript code and minifies it.

Let's take a Kendo UI file as an example. Here is what the kendo.core.js file looks like (just the top several lines) in it's normal state:

kendo_source_normal

Now here it is minified:

kendo_source_minified

Why Minify

There are several reasons for minifying code. There is some obfuscation that can be done with minification, but that's not it's primary purpose. The main reason for minifying JavaScript is that it's the fastest way to get the code to your user's browser. We like to assume everyone is on a screaming connection, but the truth is that you never know. Performance is key on the web and the best thing you can do for performance is reduce your footprint.

Lets look at a specific example from Kendo UI. The kendo.core file is required for everything, so lets look at the size of the core file (in bytes).

  • kendo.core Normal State: 89,807 (88.01 KB)
  • kendo.core Minified: 33,481 (32.6 KB)

That's a significant reduction in size. All brought to you by the magic of UglifyJS.

As a side note, if you are interested in comparing normal size with minified size for jQuery versions, check out Mathia Bynens post here.

UglifyJS V2 Pledgie Campaign

UglifyJS was written by Mihai Bazon who goes by the handle "Mishoo" just about everywhere on the interwebs. A while back Mishoo fired up a Pledgie campaign to help him raise enough funds to release UglifyJS version 2. We took notice of the campaign and talked about donating given how much benefit we have gotten from Uglify in terms of Kendo UI.

We ended up deciding to fully fund the project. We also decided to see if Mishoo wanted to come work on the Kendo UI team given his very particular set of skills.

Thankfully, he agreed!

We are excited to welcome Mishoo to the team where he will be working on some very interesting things coming in Kendo UI as well as continuing to work on UglifyJS as part of his work with Kendo UI.

UglifyJS will remain the open source project of Mishoo who is committed to it's success.

Uglify All The Things

Checkout the GitHub repo for how to get started using UglifyJS. Additionally, read the launch blog post that Mishoo wrote up on V2 and what's new and improved.

We're glad to welcome Mishoo to the team and thrilled to be able to support a tool that we have gotten so much use out of. It's worth every penny.

About the Author
is a web developer living in Nashville, TN. He enjoys working with and meeting developers who are building mobile apps with jQuery / HTML5 and loves to hack on social API's. Burke works for Telerik as a Developer Evangelist focusing on Kendo UI. Burke is @burkeholland on Twitter.

Kendo UI Winter Release, Keynote This Wednesday

$
0
0

The next major Kendo UI release is almost here! This Wednesday, November 14 is the big day, and the Online Keynote is where you need to be to get your first hosted overview of what's new. In an hour, you'll be shown all of the Kendo UI Winter Release highlights, while taking a shot at winning some pretty cool prizes:

- 13” MacBook Pro Retina
- iPad
- iPad Mini
- 25 Kendo UI Complete licenses

Do I need to say more? Register for this week's online keynote right now!
(And invite a friend…probably best if they're a developer…but all are welcome.)

The next Kendo UI release is packed with new features across all parts of Kendo UI: Web, Mobile, and DataViz. There are even a few "surprises" we've not talked about during the beta that we'll show-off during Wednesday's keynote. I don't want to spoil the fun, though, so just register and join us on Wednesday.

The keynote will begin at 11:00 AM Eastern Time (find it in your time zone) and will last about an hour, with an extended Q&A time at the end where we'll try to answer as many of your questions as we can. The entire event will be recorded, too, and published to the official Kendo UI YouTube channel shortly after the live event (for those of you in time zones not able to catch things live…sorry New Zealand!).

That’s the long and short of it. We’re busy putting the finishing touches on the keynote and preparing all of the awesome new Kendo UI winter bits!

I feel like there’s something I’m forgetting to mention, though…

Oh, right! Register for the keynote!

We’ll see you on Wednesday. :)

About the Author
is an avid HTML5, CSS3, and JavaScript advocate, and geek about all things web development. He is an active speaker and author, helping developers around the world learn and adopt HTML5. Todd works for Telerik as VP of HTML5 Web & Mobile Tools, where his current technical focus is on Kendo UI. Todd is @toddanglin on Twitter.


Kendo UI Winter Release Today!

$
0
0

Welcome to launch day for the Kendo UI Q3 Winter release. We've been hard at work since the Q2 release packing in an exhaustive set of features, fixes and sparkling new bits that we are very excited to be able to deliver to you today.

This last quarter was a daunting one for Kendo UI. We took on several major initiatives in addition to the expansion of the features and tools that are already packed into Kendo. Among all of the things squeezed into this Q3 release you will find...

  • Accessibility (a11y) Support
  • New DataViz Charts/Features
  • DataViz ThemeBuilder
  • Java Server Wrappers (Beta)
  • Image File Browser (Editor)
  • New Themes
  • So Much More…

This is just a small sampling of all of the great newness in the release. Since I can't possibly cover it all in one blog post, I'm going to hit the highlights, and I urge you to check out the release pages (they're nicely formatted and easy to read!) for Web, DataViz and Mobile.

Kendo ASP.NET MVC Music Store

We have heard loud and clear that you want to see an end-to-end solution built with Kendo UI. We're very happy to be able to deliver to you our take on the open source ASP.NET MVC Music Store - Kendo UI Style.

We've taken all of the goodness that you've come to know from the open source MVC Music Store project and thrown down on it HTML5 style including as much of Kendo UI as we could so you can see it in action from end to end.

It's officially and aptly named, "The Awesome Sauce Music Store".

You can launch the music store by visiting http://www.kendouimusicstore.com

mvc_music_store_1

You can see that I've got the AutoComplete open on the right-hand side, as well as a Kendo UI Menu gracing the top of the application.

music_store_2

If you scroll down below the banner, you will see a Kendo UI ListView.

music_store_3

MVVM Makes Life Easy

So many things in this application are dependent on the same data. As you buy albums and add them to your cart, the cart drop down updates as these items are all bound to the same data source. It's a fantastic way to see how you can keep your UI in sync when multiple pieces all depend on the same logic.

Visualizing The Music

We also included some sample sales data in a dashboard that you can see if you login. For the online demo, you can login the following credentials:

Username: owner

Password: p@ssword123

Once logged in, you will find a grid with advanced actions like sorting and filtering as well as CRUD operations.

Now the online version won't allow you to update the backend systems for obvious reasons, but it's super easy to grab this from the GitHub repo and get rolling with it on your own system.

Step 1 - Visit GitHub

Point your browser to https://github.com/telerik/kendo-music-store.

Step 2 - Click "Clone In Windows"

git_clone

If you don't have GitHub For Windows, this won't do anything so download that first. If you have no interest in getting to know GitHub at all, simple click on the Zip button next to the Clone In Windows button to get the project in a zip file. Once in the zip file, you can open the .csproj file.

If you clone, the project will be downloaded to your machine in the specified location and you can open the solution or project file from there.

Step 3 - Know All The Things

Just make sure that Nuget support is enabled and you're good to go! Full source code for the "Awesome Sauce Music Store" Kendo UI Application including all the server operations.  It’s also a great reference for how you might want to structure your front-end JavaScript code in a larger application.

Accessibility (a11y) Support

To say that being able to offer accessibility support in this release is exciting for us is a major understatement. We know well that many of you are building sites and applications where accessibility is a MUST. In fact, one of the major features in HTML5 (semantic tags) is all about accessibility. A UI framework shouldn't hamper your ability to provide accessible content to all users.

The release marks Kendo UI's adherence to many of the standards set forth by WCAG 2.0 (contrast guidelines), Section 508 and WAI-ARIA.

This new functionality comes in several flavors that you need to be aware of, so lets take a look at a few of those now.

WAI-ARIA

ARIA support is a big one. Especially for applications with rich JavaScript/AJAX based UI's. The spec was created by the W3C specifically for these sorts of apps.

The official description is:

WAI-ARIA, the Accessible Rich Internet Applications Suite, defines a way to make Web content and Web applications more accessible to people with disabilities. It especially helps with dynamic content and advanced user interface controls developed with Ajax, HTML, JavaScript, and related technologies.

Source: http://www.w3.org/WAI/intro/aria

So how exactly does ARIA work in this context and what does it do? Well it's largely to explain complex AJAX UI's to accessible screen readers through the use of additional meta data in the markup. Let's look at a quick example.

If you inspect some of the widgets in Kendo UI, you will see new markup. Specifically, you will see things like role and "aria" prefixed attributes.

Here is the numeric stepper. Notice now that there are some new attributes.

aria_metadata

  1. role="spinbutton"
  2. aria-valuemin="0"
  3. aria-valuemax="100"
  4. aria-valuenow="30"

This is Kendo UI providing the necessary information in accordance with WAI-ARIA for accessible screen readers to be able to report that this is a spin button, as well as what it's min/max and current values are.  We followed the WAI-ARIA Widget Design Guidelines when adding these new attributes to Kendo UI Web.

The best thing about the new WAI-ARIA support is that it comes out of the box now on all the Kendo UI Web widgets. There is nothing you have to do to enable it. It's automatically there by default. That means that if you have an existing Kendo UI app needing ARIA support, all you have to do to get it is use the new release. No additional code is required on your end.

Keyboard Support

We've also added full keyboard navigation to all of the Kendo UI Web widgets, including the ability to specify access keys and then preserving those access keys when new widgets are created.

Access keys are a feature where it's possible to specify a key which when combined with another key (conditional depending on the operating system) will activate the element.

This is something that exists for standard DOM elements as part of the browser. As a for instance, assume you had a form with several input's on it. You could assign each input an access key and then navigate directly to those inputs using that key.

Right now, you can navigate that form with the trusty "tab" key, but you can't go specifically to one of those inputs. However, if you add an "accesskey" attribute, you can. In this example, I have put the access key next to each field so you know what it is. Try pressing the n or b keys to see that field activated. If you are on a Mac, you will need to press "option" + the access key. If on Windows, press "alt" + access key.

Notice that this works on both the regular input and the Kendo UI DatePicker. Now the Kendo UI controls have been extended to use keyboard navigation. Set the focus to the DatePicker and press alt + ↓. This opens the DatePicker. You can also navigate inside of the widget by pressing and . Pressing ctrl + → will navigate you to the next month. We have a complete list of all keyboard shortcuts for navigation on the demo page for that widget.

datepicker_keyboard_nav

Access Keys are a great way to increase the usability of your site and forms. Now with full Keyboard support for ALL Kendo UI Web Widgets, you can deliver not just an accessible UI, but also a UI for power users who spend the majority of their time on the keyboard.

High Contrast Theme

This is a crucial item for users with impaired or low vision. You can now provide a theme which exceeds the recommended contrast settings for the vision impaired by including a style sheet in your application.

Use High Contrast Theme

<link href="css/kendo.highcontrast.min.css">

That's all you have to do! Although it's recommended that you include the k-content class on a top level element to give you entire page the high contrast theme, not just a part of it. This puts your application above the standards set by WCAG 2.0 AAA Compliance.

Here is the example from above with the high contrast theme added to it. I also added the editor control so you can see more of the high contrast in action.

Speaking of the editor, lets talk about something else that's very exciting and new in this release as it pertains to accessibility.

RTL Support

That's right! All widgets will now feature RTL support out of the box. All you have to do to turn it on is include the rtl stylesheet and provide the "k-rtl" class on a parent element. You can now fully support the localization of your application by allowing users to swap between modes, or detect their local and provide it automatically. Here is an example of our form now RTL.

You can see that everything is moved over to the right. Try typing in the textboxes to see the new support for RTL languages. Admittedly, it looks a bit funny with English! :)

DataViz Brings The Goods

This release includes a whole lot of updates to the DataViz package, including a new chart type - the StockChart. This is a new chart that allows you to stack charts on top of each other with a navigation pane down at the bottom to refine or expand the current view of the data.

stock_chart_1

In addition to using the standard chart types, DataViz now includes the candlestick and OHLC chart types allowing you to convey complex financial data with a quick glance.

DataViz also rounds out the ThemeBuilders suite with it's own ThemeBuilder in this release. This means you can now visually theme your charts and get fine grained control over how your data is visually presented.

kendo_dataviz_themebuilder

Just like the Web ThemeBuilder, this is a bookmarklet you can drag up to your bookmarks bar and then open directly on your own site so you can skin your widgets where they live - in your app!

Java Server Wrappers (Beta)

Moving on from the vast accessibility improvements and DataViz features, another huge and exciting item in this release is the Beta of Kendo UI for Java!

These are JSP server wrappers that can be used with plain jane JSP pages, or your favorite JSP framework. In fact, we rolled all the demos for the Java Wrappers in the Spring MVC Framework.

To get started with these wrappers, all you need is an Eclipse install (EE edition recommended) and the 1.7 JDK which includes the 1.7 JRE.

eclipse_jar_installIn Eclipse, just fire up a new Dynamic Web Application and select the 1.7 JRE for your server. Then drag the Kendo UI Wrappers JAR file into the lib folder in your project.  Just add the kendo js, styles and of course jQuery files as normal for a Kendo UI application. Install complete!

Now you can begin to use the Kendo tags in a JSP page by referencing the tag library at the top.


Include Kendo Tag Library

<%@ taglib prefix="kendo" uri="http://www.kendoui.com/jsp/tags" %>

To create a new Kendo UI widget, simply open a tag and begin typing "kendo". Eclipse will begin to suggest possibilities for you.

eclipse_intellisense_on_tag

You can alternately do ctrl + space to get hints on attributes for a specific tag. For example, the DataSource for the AutoComplete can be specified inline as an attribute...

eclipse_attribute_hint

...Or as a configuration inside the AutoComplete tags. For instance, here is a fully configured AutoComplete:

AutoComplete Widget With JSP Wrappers

<kendo:autoComplete name="autoComplete" dataTextField="Name" 
    placeholder="Enter A Customer Name..."><kendo:dataSource><kendo:dataSource><kendo:dataSource-transport-read url="/customers"/></kendo:dataSource></kendo:dataSource></kendo:autoComplete>

The Kendo UI Java Wrappers take care of inserting all of the correct JavaScript to make this AutoComplete work. You also have the added benefit of Eclipse checking your markup so you can be sure that all the tags are well-formed. And as always, you can mix JavaScript in with your kendo tags to get the maximum amount of control in granularity.

Whew! That's some really nice stuff for Java Developers and we're really excited for you to be able to download it today be among the first to kick the tires.

Image Upload For Editor

One thing that you have asked for loud and clear is the ability to upload an image from the Editor control instead of having to specify a URL.

We're pleased to present the Image Upload feature that has been added to the Editor in this release.

image_editor_upload

Now clicking the image icon can display a Kendo Window allowing users to select from an existing image on the server, upload a new one, or specify a URL. And it's all configurable to show the options that you want to show. You can disallow certain file extensions, get rid of the upload piece altogether, and even specify how to handle an existing file conflict.

This allows you to have a full fledged image manager for your Editor on any server. For instance, Web API is fantastic for Async I/O tasks like this. Check out the excellent example that is provided on Codeplex for handling your image uploads with WebAPI.

http://aspnet.codeplex.com/SourceControl/changeset/view/7032a5db4d6a#Samples/Net45/CS/WebApi/FileUploadSample/Controllers/FileUploadController.cs

Of course you can handle the upload with PHP, Java, Rails, Node or whatever makes you happy. Even classic ASP if that's what you're into!

Handling image communication between the client and the server is sticky at best with straight HTML, but the Editor control is making it much easier with the new Image Browser feature.

New Themes

We've got some really exciting new themes in this release. Besides the High Contrast theme that was mentioned previously in regards to accessibility, we also have the new Metro Black theme which looks great with the DataViz and building dashboards.

metroblack

We've also included a few more themes for you out of the box including…

  • Bootstrap (for you Twitter Bootstrap fans out there!)
  • Moonlight
  • Uniform

As always, you can use the Theme Builder to customize these themes to your heart's desire right on your own site with the Theme Builder bookmarklet.

So. Much. Kendo.

There is so much in this release and we've just hit some of the high points here. Make sure you download the new bits and checkout all the great new stuff we've got for you. Stay tuned for the post after the keynote where we provide all the resources from the demos as well as a recording of the live keynote in case you happened to miss it.

We’re on a journey to create the best web and mobile application development framework and today marks yet another huge step in that direction.  We look forward to seeing the things that you will build with the new features announced today.  We love to create new features, but it’s what YOU do with it that really blows us away.

About the Author
is a web developer living in Nashville, TN. He enjoys working with and meeting developers who are building mobile apps with jQuery / HTML5 and loves to hack on social API's. Burke works for Telerik as a Developer Evangelist focusing on Kendo UI. Burke is @burkeholland on Twitter.

Announcing Kendo UI Premium Forums

$
0
0

In addition to today's HUGE Kendo UI Winter Release, we're also introducing the Kendo UI Premium Forums. This is an important change for the forums on KendoUI.com, and we think this change will elevate the already premiere Kendo UI support experience to new heights.

Since support is so important to Telerik and Kendo UI, I want to take a minute to fully explain Premium Forums, why we are introducing this change, and how you, our customers, are going to benefit.

What’s the Problem Today?

Before I explain the new Premium Forums, let me first explain the problem with today’s KendoUI.com forums that Premium Forums will fix.

Since the introduction of Kendo UI, we have provided two ways for Kendo UI developers to get answers to their questions: Support Tickets and Forums.

Support Tickets are available to all Kendo UI customers and free trial users. Every support ticket is assigned to a Kendo UI support staffer or a member of the Kendo UI Engineering Team, and has a guaranteed response time. Every question gets addressed with the kind of thorough attention to detail Telerik is legendary for providing.

Forums, meanwhile, are a venue for the Kendo UI community to assist each other. While Kendo UI engineers and developer advocates may occasionally assist in the forums, the forums are not an official support channel.

For several reasons, though, the Forums have been perceived as an official channel for getting Kendo UI support, which has lead to frustration when forum questions don’t receive answers. And while we’d love to answer every question that comes through the open and free forums, supporting our customers comes first. Meanwhile, all of the great questions and answers happening in the support tickets are only helping one person at a time. There’s a lot of great knowledge getting “trapped” in private tickets.

Bottom Line: We want a way to deliver premium support via public forums while still ensuring our customers users get priority access to Kendo UI’s valuable support team.

What are the Premium Forums?

When they go live in late November, the Kendo UI Premium Forums will provide "support ticket-like" attention and answers to all Kendo UI forum threads. That means the forums will be monitored by Kendo UI's support staff and product engineers to ensure all questions get addressed. All threads will have a guaranteed response time, too, so you'll get answers quickly and from the experts behind Kendo UI.

To deliver this level of support service, though, Premium Forums will be limited to customers and 30-day free trial users. All other visitors to KendoUI.com will have read-only access to the information in the forums, but only customers and active trial users will be able to create new threads and post comments to the forums.

What’s the Difference Between Support Tickets and Forums?

With the introduction of Premium Forums, the differences are slight. The best way to think about the difference is this:

  • If your question does not contain any sensitive company/project specific information, it is a good candidate for the Kendo UI Premium Forums. By asking your question here, you’ll get the same guaranteed response as a Ticket, but you’ll gain extra insight and help from the Kendo UI community, and all of the answers to your question will benefit other developers that follow in your tracks.
  • If your question does contain information you don’t want to discuss in public view, then open a Support Ticket.

We expect that most customer questions will be best suited for the Kendo UI Premium Forums. Only in cases where more sensitive project details must be shared to troubleshoot a problem will a formal, private support ticket really be required.

Will there be “Non-Premium” Forums on KendoUI.com?

When we introduce Premium Forums on KendoUI.com later this month, we will no longer have “non-premium” or free forums. At least, not for now. Open community forums may be re-introduced at a later point once we can develop better systems for recognizing and incentivizing community contributions.

For now, though, we are directing all community questions for Kendo UI to an open forum that we think does the best job today of cultivating a vibrant, self-help developer community: StackOverflow.

StackOveflow has an active JavaScript and HTML5 developer community racing to answer open questions, including questions covering Kendo UI, and for those developers opting to work with Kendo UI without paying for support, we think this provides the best channel for getting answers. Plus, as a bonus, if you’re a Kendo UI expert, you can build your StackOverflow reputation by helping other developers that have Kendo UI questions!

Okay, okay. Does this Change Impact Me?

If you are a Kendo UI customer, the only impact for you should be even better support! If you are part of the much smaller group working with Kendo UI that does not fall-in to one of the previous categories (licensed customer or 30-day free trial users), we’d encourage you to purchase a Kendo UI support contract after you’ve adopted Kendo UI so we can provide the same great support our customers love! (If you need help with that, simply contact us with an email to clientservice@kendoui.com)

When Will Premium Forums Go Live?

First things first: Nothing is changing today.

What you will see today is a banner on the Kendo UI Forums advising all forum users of the coming Premium Forum change. The banner will be visible for the next 2-weeks, but otherwise the forums will not change. We want to give everyone ample opportunity to prepare for the Premium Forums change.

After this 2-week awareness period, the Premium Forums will be enabled. At this time, all forums on KendoUI.com will be "read-only" unless you're a logged-in customer. You will still be able to read threads that you started before this change, but new threads and posts will require an active support license log-in.

I’ve Got More Questions!

I’ve got more answers! We published today a complete FAQ with answers to many of the most common questions surrounding Premium Forums. I encourage you to review that FAQ if you have more questions about how Premium Forums will work. If you still can’t find your answer, contact us at clientservice@kendoui.com and we’ll do our best to help.

It is our sincere hope that this change delivers a better support and forum experience to all Kendo UI customers. As Kendo UI continues to grow and evolve, our commitment to delivering industry leading support is unwavering. I’d love to personally hear any feedback (good or bad) from you as this change roles-out. I can’t always guarantee a reply, but I can guarantee a read: anglin@telerik.com

Enjoy the Kendo UI Premium Forums and go build awesome apps with the latest Kendo UI Winter Release!

About the Author
is an avid HTML5, CSS3, and JavaScript advocate, and geek about all things web development. He is an active speaker and author, helping developers around the world learn and adopt HTML5. Todd works for Telerik as VP of HTML5 Web & Mobile Tools, where his current technical focus is on Kendo UI. Todd is @toddanglin on Twitter.

Kendo UI Keynote Recording & Winners

$
0
0

Thanks again to everyone that joined the live Kendo UI keynote yesterday! More than 1,200 people showed-up to help clog the interwebs and learn about what's new in Kendo UI's latest Winter Release. We had a great time showing-off what we've been hard at work building over the last four months, and we hope you had fun seeing it in action.

If you missed the live event (or had a technical problem), you can watch the recorded on-demand version on Kendo UI's YouTube channel now! Nearly 500 people have already caught the on-demand version, so watch it now and then share it with a friend.

Keynote Raffle Winners

While I know you joined the keynote for the Kendo UI content, the fact that we're raffling some pretty cool prizes is a nice bonus! As a reminder, just by participating in yesterday's keynote, you are in the raffle for one of these great prizes:

  1. 13" MacBook Pro Retina (+ Kendo UI Complete license)
  2. iPad (+ Kendo UI Complete license)
  3. iPad Mini (+ Kendo UI Complete license)
  4. 22 more Kendo UI Complete licenses ($15,000 value!)

If you are a winner, congratulations! By now, you should have received an email informing you of your prize. But because we know everyone fears that the Internet ate their mail when it comes to prizes, here's a full list of the winners:

GRAND PRIZE WINNERS

  1. MacBook Pro Retina: Chris Pauly
  2. iPad: Alper Gokcehan
  3. iPad Mini: Ryan Nauman

KENDO UI COMPLETE LICENSE WINNERS

  • Muhammad Naseer
  • Marc Preddie
  • Andrew Royal
  • Krasimir Nikolov
  • Stéphane Mitermite
  • Andreas Graefe
  • Roland Guijt
  • Constantin Nedu
  • Spyros Botsis
  • Philip Dodge
  • Simon Papworth
  • Kevin Huck
  • Phil Chong
  • Rick Levin
  • Michael Lechner
  • Sudha Subramanian
  • Robin Giltner
  • Perry van der Meeren
  • Darryl Buckby
  • Zoran Bogicevic
  • Sijie Chen
  • Juan Herroros

Congrats again to all the winners!

Twitter Contest Ends Tomorrow

Don't forget! There's one more chance to win a Kendo UI Complete license ($700 value). All you have to do is tweet something you love about Kendo UI by tomorrow (Friday), midnight Eastern, and you'll be in another random prize drawing. Your tweet must include the #kendoui hashtag so we can find it to be part of this contest. 

We'll announce the winner on Monday via the official @KendoUI twitter account, so be sure to follow @KendoUI so you don't miss the news.

Enjoy the latest release, enjoy the prizes, and go build awesome sites and mobile apps with Kendo UI!

About the Author
is an avid HTML5, CSS3, and JavaScript advocate, and geek about all things web development. He is an active speaker and author, helping developers around the world learn and adopt HTML5. Todd works for Telerik as VP of HTML5 Web & Mobile Tools, where his current technical focus is on Kendo UI. Todd is @toddanglin on Twitter.

Fixing FOUJUI: Another Practical Example

$
0
0

One of the cool things we released along with the Kendo UI Winter Release last week is the brand new Kendo UI Music Store demo. It’s a complete, end-to-end demo designed to show many of the pieces from Kendo UI Web, DataViz, (and soon Mobile) working together in the context of a “real app,” along with the necessary server code to expose JSON web services and load and persist data in a database. It is based on a Microsoft demo originally created for ASP.NET MVC, but the concepts are universal. Our plan is to eventually provide alternate implementations of the server code in Java and PHP so you can view the demo in the language you prefer most.

The complete source for the demo is available on GitHub.

This demo also happens to be one the top requested features (more than 480 votes!) on the official Kendo UI UserVoice feedback portal (feedback.kendoui.com). We’re stoked that this demo delivers on one the major things you guys (our customers and community) have been demanding for a while.

So, we’re happy with the demo, but in the initial release it had a problem. It had FOUJUI.

Music Store “Flash of Uninitialized JavaScript UI”

More than a year ago, I coined "FOUJUI" to described a problem common to applications that rely heavily JavaScript UI. In short, FOUJUI occurs when you rely on JavaScript to build part of your UI (render HTML/apply CSS) after your page loads. Since JavaScript takes time to download and run, users potentially see a version of your page "pre-JavaScript UI" and then suddenly (after your scripts run) they see the "correct" layout.

The problem is easy to ignore since it doesn't impact the function of an app or site, but it's ugly, distracting, and not the kind of first impression you want to give your users.

The first release of the Kendo UI Music Store demo did exactly this. Because Kendo UI Web widgets were used with a mix of server-side HTML rendering, there was a brief flash of the uninitialized HTML (as rendered on the server) before the JavaScript ran and the final layout kicked-in. You can see the effect in the GIF below:

KendoMusicStore-FOUJUI


This is a perfect chance to fix FOUJUI and show one technique for solving the problem in your own apps.

Fixing FOUJUI with Opacity Animation

I’m a big fan of fixing FOUJUI with opacity animations. The technique is simple and the effect looks very nice. In general, the idea behind this solution is:

  1. Hide (via opacity) the HTML that must be initialized by JavaScript
  2. Run your JavaScript to initialize the UI (such as your Kendo UI widget JavaScript)
  3. Show (via opacity) the final, initialized HTML UI

Why opacity? Why not use something like “display:none” or “visibility:hidden”? Two reasons:

  1. By working with opacity, we’re not triggering layout changes when we toggle between “invisible” and “visible” UI. Changing an element to “display:none” actually removes it from the document layout, which we don’t need (or want) to do. That’s extra work for a browser, and it potentially introduces new undesired UI reflows as elements are shown with “display:block.”
  2. Meanwhile, “visibility:hidden” can be used to hide/show elements without removing them from the layout, but there is no way to animate the “visibility” CSS property. It’s binary: hidden or visible. Opacity gives us the ability to animate (if we want to) the visibility of an element from 0 to 1. As a bonus, if we use CSS transitions, the opacity animation can also be hardware accelerated (in supported browsers).

The first step to fixing the problem in our Music Store demo, then, is hiding all portions of the UI that need to be initialized by JavaScript. You can, of course, hide ALL of your page UI (similar to a loading screen), but that’s a bit heavy handed for the web. I’d prefer to just hide the areas that need initialization. Done well, odds are many users won’t even notice the loading effect, which is a good thing!

Referring to the GIF above, we can see one of the worst FOUJUI offenders is the Menu. In the Music Store (as in many apps), the menu HTML is rendered dynamically server-side making the sub-menu items appear as visible un-styled links until Kendo UI is initialized.

MusicStore-FOUJUI-Menu

We should do two things for this type of situation to provide the best loading experience:

  1. “Pre-build” more of our HTML. While dynamic JavaScript UI can handle the task of taking very simple HTML and rendering all necessary styles and HTML, for fixing FOUJUI, sometimes it’s better to “pre-build” more of the HTML- particularly CSS styles and classes- by hand. This ensures the HTML is styled correctly as soon as it’s seen by the user (assuming our stylesheets are properly loaded).
  2. Hide HTML that should be initially hidden. Most of the menu items we see should not be visible, even after the JavaScript UI is initialized. We can “help” during page load by manually hiding these items instead of waiting on our JavaScript to do the work for us.

The code required for these two techniques is quite simple:

<!--BEFORE-->
<ul id="menu" data-role="menu">

<!--AFTER-->
<ul id="menu" data-role="menu" 
    class="k-widget k-reset k-header k-menu k-menu-horizontal" 
    style="opacity:0;">


It’s a little more work, but it is worth it when you’re optimizing for FOUJUI. If you’re not sure how to build the HTML by hand, just inspect elements using browser dev tools to see what JavaScript normally does to build the final widget HTML and CSS.

For the rest of the elements on the Music Store homepage, I apply more of a catch-all FOUJUI opacity setting:

<div id="body" style="opacity:0;">
   <!--Server-side view engine code-->
   @RenderBody()
</div>


Next, I need to setup my CSS transition so that the eventual opacity change will be animated by the browser. Adjusting the length of this animation will determine how subtle or “obvious” the loading animation appears.

/*  Global CSS Transitions
    ------------------------------------- */

* { 
    -webkit-transition:opacity 1s;
    -moz-transition:opacity 1s;
    transition:opacity 1s;
}


I’ve used the universal selector to apply the transition to all opacity changes in my app. It has no perf implications (as I discussed previously), and it’s more convenient than explicitly targeting all CSS selectors where I want this transition to happen. Only one word of caution: if you are using opacity to do other things in your app, the universal selector approach could cause some unintended transitions.

Finally, I just need to run some JavaScript to change the opacity of these now hidden elements from 0 to 1 once I know the necessary JavaScript UI initialization is complete. The animation will happen “for free” thanks to CSS transitions. To keep things simple, I can just put this line at the bottom of my page, after all other JavaScript has run, implicitly ensuring the opacity change happens after my JavaScript UI is ready:

<script>
   //Place this at the bottom of the page (after all other scripts)
   $("#body").css("opacity", 1);
</script>


Ideally, you want to run this code as soon after JavaScript widgets are initialized to minimize the time it takes for users to see your UI. In the case of the Music Store, I use the “bottom of the page” technique for most elements, except UI widgets in the page header (like the Menu). For the menu and search box, I run very similar code in the JavaScript module that initializes those Kendo UI widgets.

(If you want to see all of my changes, exactly as I applied them to the Music Store demo, here is the git commit showing exactly what I did.)

No More FOUJUI

After these simple change are applied, our FOUJUI is gone! Now, thanks to some extra hand-coded HTML and precise opacity settings, users see most of the UI when the page loads, and the pieces that need initialization are pleasantly displayed when they’re ready. The final effect can be viewed live on the demo site, or you can see the result in the GIF below:

KendoMusicStore-FOUJUI-Fix


Don’t Ignore FOUJUI

I said it once in this post, but I’ll say it again. Don’t ignore FOUJUI!

It’s easy to do. If nothing else, the Music Store demo proves even teams with awareness of the problem and solution can overlook this obvious detail. The problem is easily solvable if you take the time to polish your final result.

As more UI moves to the client (instead of being rendered on the server), apply techniques like this so the web remains a beautiful place and not a frustrating mess of “now you see it, now you don’t” HTML. Got it? Good.

About the Author
is an avid HTML5, CSS3, and JavaScript advocate, and geek about all things web development. He is an active speaker and author, helping developers around the world learn and adopt HTML5. Todd works for Telerik as VP of HTML5 Web & Mobile Tools, where his current technical focus is on Kendo UI. Todd is @toddanglin on Twitter.

Backbone And Kendo UI: A Beautiful Combination

$
0
0

I see a lot of questions about using Backbone and various UI / widget frameworks with it. There seems to be a bit of a fear in some people's minds that they won't be able to use their widget framework of choice if they are using an MV* libraries or framework for building JavaScript apps. Fortunately, this is far from the truth. Backbone and other MV* libraries and frameworks provide a much needed layer of abstraction to separate data from view concerns, but they do not replace or obviate the need for widget frameworks like jQuery UI or Kendo UI. Quite the opposite, really.

Backbone, in particular, doesn't promote a specific widget framework of any kind. It does promote the use of jQuery or similar libraries (such as Zepto), though. This opens up a world of possibilities for widget frameworks that also use jQuery, such as Kendo UI.

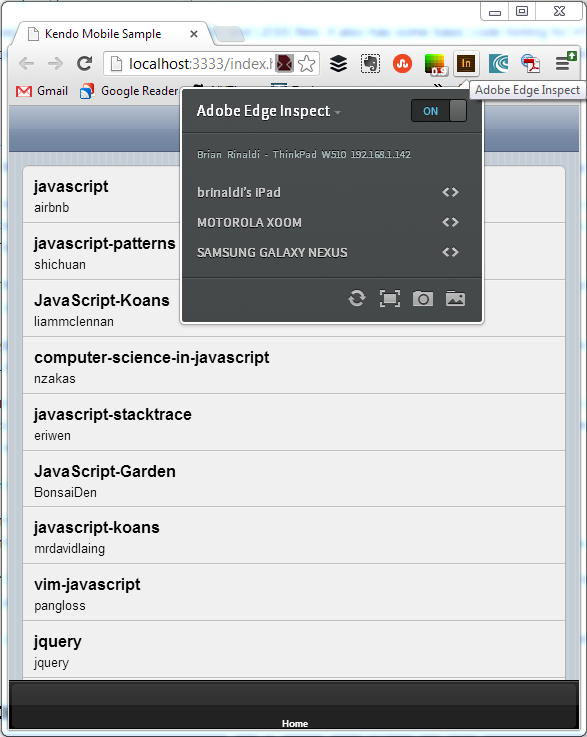
There are a few tricks to making Backbone and Kendo UI play nicely together, though. Fortunately these are simple tricks that are easy to understand once you recognize how Backbone deals with DOM elements. But before we get into the details of wiring up Backbone and Kendo UI together, it's important to understand not only where that will happen, by how and why.

Backbone.View And DOM Elements

Backbone uses the concept of a "View" object to manage and manipulate DOM elements in the browser. There's some debate as to whether Backbone.View is acting like a "Controller" in an Smalltalk-80 style MVC framework, a "Presenter" in an MVP framework, or some other flavor of the MV* variations. But the difference between all of these and which one Backbone falls directly in to is less important than understanding that Backbone implements a style of separated presentation. This means that we keep our canonical data source and application logic out of the view layer. This allows the view to focus on it's specific tools and technologies for managing and manipulating what the user sees and how the user interacts with the application.

In the case of Backbone, the Backbone.View object is responsible for managing and manipulating the HTML and DOM that the browser renders on the screen. Anytime we need to update the DOM, read data from the DOM, enable or disable a Kendo UI widget or do any other work with the DOM, we do it through a View instance.

To attach itself to the DOM, every Backbone.View instance has a reference to a DOM element through two attributes: el and $el ("el" is short for "element" - a common naming convention for dealing with DOM elements in JavaScript code). The el attribute is either a string representation of the DOM elements that this view manages, or a jQuery selector that points to some existing DOM elements in the browser window. The $el, then, is a cached jQuery selector object for the view's el. This allows us to use jQuery methods like append and prepend, fadeIn and fadeOut or any other jQuery method we need when manipulating the DOM.

Specifying 'el' As A jQuery Selector

If a jQuery selector is specified as the el when defining the view, the resulting jQuery object will become the view's el and $el:

<body>

  <navigation class="menu">
    <ul>
      <li>Menu Item</li>
      <li>Another Item</li>
    </ul>
  </navigation>

  <header>
    <h2>Article Title</h2>
  </header>

  <article>
    <p>some article content</p>
  </article>​

</body>
<script>
var MyView = Backbone.View.extend({

  // specify a jQuery selector, such as a css class or id
  el: "navigation.menu"

});

// get a view instance
var view = new MyView();

// log the view's $el, the jQuery object for the <article> tag in the above HTML
console.log(view.$el) 
```
</script>


This is useful for attaching views to existing HTML that has been rendered on the server or by another framework or widget prior to our Backbone.View instance being created. We can generate our own HTML as well, which is more common when building Single-Page Applications (SPA's) with Backbone.

Generating Our Own 'el'

If we don't specify an el for the view definition, Backbone.View will generate an HTML tag for us - a <div> tag by default. We can specify any tag name we need using the tagName attribute, and any attributes for the tag using the attributes hash, css classes using the className attribute, and css id using the id attribute as well. Once the view instance is created, we have access to the view's el and $el. Then we can provide a render method on the view to generate all of the HTML contents for the view's $el.

var MyView = Backbone.View.extend({

  // generate a <ul> tag for this view
  tagName: "ul",

  // give this `$el` a css class
  className: "menu",

  // render additional HTML contents
  render: function(){
    var html = "<li>a menu item</li><li>another menu item</li>"
    this.$el.html(html);
  }

});

// get a view instance
var view = new MyView();

// render the view to populate it's `el` appropriately
view.render();

// log the view's $el, the jQuery object for the <article> tag in the above HTML
console.log(view.$el) 

// Attach the view's el to the DOM
$(".some-parent-element").empty().append(view.$el);


There's a lot that can be done with views, and many different ways to populate the el of the view. How we populate it also makes a difference in how we wire up our plugins and widgets, too. In the first example, the use of a jQuery selector means that we are attaching to DOM elements that already exist in the visible DOM. In the second example, though, we are not attaching the rendered el to the DOM until the very last line where we are using a jQuery selector to find the .some-parent-element, empty out the existing content of that element and then append the view's $el in to it. This is done because a Backbone.View instance is not attached to the visible DOM, by default. We have to attach the view to the DOM ourselves, by either using a jQuery selector for the el or by adding the generated el to the DOM like this example shows.

The need to attach the view to the DOM ourselves has several implications. It gives us a potential performance increase over manipulating existing DOM elements. But it also affects how and when we will initialize and use widget frameworks like Kendo UI.

For more information about the basics of working with Views, rendering with JavaScript template engines, using jQuery selectors for the el and information on structuring them, working with DOM events and more, see the following resources. For now, though, this basic understanding of how to either render a view or use a jQuery selector will be enough.

DOM Dependent / Independent Widgets

There are two basic types of HTML widgets, in my experience: those that are depending on the visible DOM and those that are not. DOM dependent widgets are those that need to know and / or manipulate the actual size or location and ordering relative to other DOM elements. These attributes are only available to the plugin when the element in question is attached to the visible DOM. DOM independent widgets don't need to know exact positioning on the screen, may not need to calculate sizes based on other surrounding or sibling elements, and can generally be set up without having to access information that is only available to visible elements.

This difference might seem arbitrary or unimportant at first glance, but it has a tremendous impact on when and where we wire up our Kendo UI widgets with our Backbone views.

When we build a Backbone.View that is attached to an existing DOM element, it doesn't make much difference when or where we call the .kendo methods. As long as the view is already attached, the Kendo widget will be able to process it correctly.

When we're dealing with a Backbone.View that renders its own content, though, then we have to think about whether or not the Kendo widget we want to use depends on the DOM or not. If it doesn't, then we can call the Kendo widget method any time after the view has been rendered. If the widget is dependent on the DOM, though, we have to wait until after the view's el has been added to the DOM before calling the Kendo widget method.

With that in mind, let's look at a few examples of integrating Kendo and Backbone with both DOM independent and DOM dependent widgets and controls.

Working With Kendo UI's Menu Widget

In the first view example, above, the view is defined with a jQuery selector. Since the HTML elements for this view already exist in the DOM, we could activate any Kendo UI plugin that we want, at any time. For example, if we want to turn the <ul> in to a Kendo Menu, we would only need to add the necessary call to .kendoMenu() on the view's $el. It doesn't make much difference when we call this method since the HTML that is being manipulated is already part of the DOM. We could even put the .kendoMenu() call in the view's initializer:

var MenuView = Backbone.View.extend({

  // select the menu from the DOM
  el: "navigation.menu",

  // The "initialize" method like a constructor. It is called when we call "new MenuView()".
  initialize: function(){

    // find the "<ul>" tag in this view's "el", and turn it in to a menu
    this.$("ul").kendoMenu();

  }

});

// Create the view, and turn the navigation element in to a menu.
var menu = new MenuView();


The result can be seen in this JSFiddle.

But the Kendo UI menu is not a DOM dependent widget. The processing it does in order to build the correct CSS and JavaScript for the menu does not need the <ul> elements in the DOM prior to processing it.

var MenuView = Backbone.View.extend({

  tagName: "ul",

  render: function(){

    // "render" a menu of list items
    var content = "<li>Menu Item</li><li>Another Item</li>";
    this.$el.html(content);

    // The rendered items are not yet in the DOM. They are only
    // attached to the view instances. But we can still call
    // KendoUI's ".kendoMenu()" because this widget is not
    // dependent on the visible DOM
    this.$el.kendoMenu();

  }        
});

// Create the view
var menu = new MenuView();

// Render it and convert it in to a Kendo UI menu
menu.render();

// Attach it to the DOM
$("navigation.menu").append(menu.$el);​

The result can be seen in this JSFiddle.

In this view instance, we are generating the menu items in the view's render method. After generating the items, we then call the kendoMenu() function on the view's $el directly. But In the first example, we called kendoMenu() on a jQuery selector that found the <ul> underneath of the view's $el. Why the difference? The answer is in the view's $el itself. In the first example, we are attaching the view directly to the <navigation class="menu"> element. Since Kendo's menu wants to work with a <ul>, we had to find that element within the view's el. In the second example, though, we are having Backbone.View generate a <ul> tag as the view's el directly. This means we don't need to find any child element for Kendo's menu. We can apply the menu directly to the view's el.

In both of these examples, the menu displays correctly because the Kendo Menu is not dependent on the visible DOM. There are some cases where the control or widget is dependent on the DOM though. And trying to display a DOM dependent widget before the view is in the DOM will cause all kinds of problems.

Working With Kendo UI Splitter

Unlike the Kendo Menu control, the Splitter control is DOM dependent. If we set up a Backbone.View that renders the necessary set of <div> elements (in this case, borrowed from the Splitter demo page and converted to an UnderscoreJS template) and try to immediately call the .kendoSplitter() method, the results will not be anywhere near what we expect.

<script type="text/html" id="layout-template">
        <div id="top-pane">
            <div id="horizontal" style="height: 100%; width: 100%;">
                <div id="left-pane">
                    <div class="pane-content">
                        <h3>Inner splitter / left pane</h3>
                        <p>Resizable and collapsible.</p>
                    </div>
                </div>
                <div id="center-pane">
                    <div class="pane-content">
                        <h3>Inner splitter / center pane</h3>
                        <p>Resizable only.</p>
                    </div>
                </div>
                <div id="right-pane">
                    <div class="pane-content">
                        <h3>Inner splitter / right pane</h3>
                        <p>Resizable and collapsible.</p>
                    </div>
                </div>
            </div>
        </div>
        <div id="middle-pane">
            <div class="pane-content">
                <h3>Outer splitter / middle pane</h3>
                <p>Resizable only.</p>
            </div>
        </div>
        <div id="bottom-pane">
            <div class="pane-content">
                <h3>Outer splitter / bottom pane</h3>
                <p>Non-resizable and non-collapsible.</p>
            </div>
        </div>

</script>

<div id="placeholder"></div>​


Sidebar: We're wrapping the necessary HTML in a <script> block and giving it a type attribute that the browser doesn't understand. This prevents the browser from trying to execute this script block as JavaScript. The addition of an id attribute allows us to use jQuery selectors to find it quickly, and pull the contents out for rendering in our template.

For information about Underscore.js templates, and why this HTML is wrapped in a <script> block, see the following resources:

The view, then, renders this template and calls the necessary .kendoSplitter methods:

var SplitterLayout = Backbone.View.extend({

    id: "vertical",

    render: function(){

        // compile the template using Underscore.js (a pre-requisite of Backbone)
        var template = $("#layout-template").html();
        var content = _.template(template, {});

        // Stuff the content in to the view
        this.$el.append(content);

        // The content is not yet in the DOM. We can try to call the
        // kendoSplitter function on it, but it won't turn out the way it should.
        this.$el.kendoSplitter({
            orientation: "vertical",
            panes: [
                { collapsible: false },
                { collapsible: false, size: "100px" },
                { collapsible: false, resizable: false, size: "100px" }
            ]
        });

        $("#horizontal").kendoSplitter({
            panes: [
                { collapsible: true, size: "220px" },
                { collapsible: false },
                { collapsible: true, size: "220px" }
            ]
        });
    }

});

// Create the view and render it
var splitter = new SplitterLayout();
splitter.render();

// Add it to the DOM
$("#placeholder").append(splitter.$el);


The failing result can be viewed at this JSFiddle.

This code fails miserably. We don't see any of the content. The splitter controls are not showing up correctly, and there is a general sense of something gone wrong, given the bleak visual output of this code.

Instead of trying to run the .kendoSplitter calls immediately after rendering, then, we need to wait until the view has been added to the DOM. Once we've done that, we can call the .kendoSplitter methods and display the splitter controls correctly.

To keep the code related to this view - including the use of the splitter - encapsulated within the view, we'll move the call to .kendoSplitter() to a method of it's own. Then after the view has been added to the DOM, we'll call that method.

var SplitterLayout = Backbone.View.extend({

    id: "vertical",

    render: function(){

        // compile the template using Underscore.js (a pre-requisite of Backbone)
        var template = $("#layout-template").html();
        var content = _.template(template, {});

        // Stuff the content in to the view
        this.$el.append(content);

    },

    showSplitter: function(){    
        // The content is in the DOM now. We can call the kendoSplitter function on it, 
        // and it will turn out the way we expect it to
        this.$el.kendoSplitter({
            orientation: "vertical",
            panes: [
                { collapsible: false },
                { collapsible: false, size: "100px" },
                { collapsible: false, resizable: false, size: "100px" }
            ]
        });

        $("#horizontal").kendoSplitter({
            panes: [
                { collapsible: true, size: "220px" },
                { collapsible: false },
                { collapsible: true, size: "220px" }
            ]
        });
    }

});


// Create the view and render it
var splitter = new SplitterLayout();
splitter.render();

// Add it to the DOM
$("#placeholder").append(splitter.$el);

// Call the view's "onShow" method because we have added it to the DOM,
// meaning it is now visible, or being shown in the browser
splitter.showSplitter();​


The working splitter can be viewed at this JSFiddle.

This produces the desired result - a set of splitter controls - and illustrates the problems that can be caused by trying to using a DOM dependent widget before the Backbone.View instance has been attached to the DOM.

Reducing Boilerplate Code

Moving the splitter code to its own method reduces the amount of code in the render method, and makes the setup of the splitter code reusable within the view. But we're left with a lot of boilerplate code for the view rendering, placement in the DOM, and calling of the code to set up the splitter. Any application of even minimal size will quickly run in to duplication of this code and logic, and either copy & paste a lot of the same code or be drawn to an existing application framework such as MarionetteJS to reduce the boilerplate.

The good news with Marionette - an open source application framework for scaling Backbone application with event-driven, modular and composite application architectures - is that it not only reduces the boilerplate for rendering, but also for the timing of when the view has been added to the DOM, to call DOM dependent code. We can take advantage of the code that is built in to the Region object to show a view in a specific DOM element and call an onShow method on the view automatically. We can then update the view to call the splitter code from onShow, take advantage of Marionette's built-in UnderscoreJS template rendering, and reduce the amount of code we need to write, significantly.

var SplitterLayout = Marionette.ItemView.extend({
    template: "#layout-template",

    id: "vertical",

    // The "onShow" method is called by Marionette's region, after the
    // view has been placed in the DOM
    onShow: function(){    

        // The content is in the DOM now. We can call the kendoSplitter function on it, 
        // and it will turn out the way we expect it to
        this.$el.kendoSplitter({
            orientation: "vertical",
            panes: [
                { collapsible: false },
                { collapsible: false, size: "100px" },
                { collapsible: false, resizable: false, size: "100px" }
            ]
        });

        this.$("#horizontal").kendoSplitter({
            panes: [
                { collapsible: true, size: "220px" },
                { collapsible: false },
                { collapsible: true, size: "220px" }
            ]
        });

    }

});


// Create a region to manage the content of the "#placeholder" element
var region = new Marionette.Region({
    el: "#placeholder"
});

// Create the view
var splitter = new SplitterLayout();

// Show the view in the region
region.show(splitter);


The results of this code can be found at this JSFiddle.

The use of Marionette provides several benefits in this case, but the one that we care about the most is the call to the view's onShow method after the view has been added to the DOM. It's the Marionette.Region object that handles calling onShow on the view, if that method exists, because it's the Region that manages pushing the view in to the DOM. This has effectively automated the code from the previous example.

For more information about MarionetteJS, Regions, and what it can do for your applications, see the following resources:

The examples I've shown so far are useful but also trivial. Generating or using a fixed set of HTML elements makes it easy to see how we can integrate Backbone and Kendo UI. Most developers won't find this terribly useful, beyond a simple academic exercise and basic example, though. When it comes down to it, applications run on data and that data is often used to build the HTML structure which our Kendo UI widgets will use. So, let's see a real example of how this would work - something worthy of being used in a production application.

Generating A PanelBar With Models, Collections And MarionetteJS

Backbone supports two basic types of data structures: Backbone.Model and Backbone.Collection. A model is used as the canonical data source for Backbone based application, and collections are just groups of similar or related models. When we get data from a server or read data from the DOM, we stuff it in to models and collections. Then when we need to update the DOM to show some data, we pass the models and collections to our views and have the views render templates that include the data from the models and collections. Using models and collections to store and retrieve data gives us a lot of flexibility in how we process the data, separate from how we process the user interface or application workflow. It also gives us an easy to way to integrate data in to Kendo UI widgets, through the Backbone.View objects.

For example, it's common to build lists of things with Backbone.Collection instances. Whether it's a menu view, a drop list or panel bar, Backbone.Collection can provide the data we need to build the HTML structure for our Kendo controls, easily.

To construct a Kendo PanelBar with Backbone, we need a few things:

  • A Collection of Models with our data
  • A way to group the models in to panels
  • A way to render the list of models as the appropriate HTML elements

This can be achieved through the use of a single Backbone.View, but it gets messy, quickly. The work that it takes to build the necessary hierarchy of HTML controls typically ends up in the view template, which pollutes the separation of Backbone.View logic vs HTML being generated. This makes it difficult to know where to look when something goes wrong, makes the templates difficult to understand, and generally makes it hard to work with the data and controls. Instead, we should look at creating a hierarchy of views that match our data hierarchy.

Backbone.View doesn't have any direct support for building a hierarchy of views, out of the box. But it also doesn't prevent that from happening, either. It's not terribly difficult to iterate through a collection within a view, and then render a new view instance for each item in the collection. But this code does get somewhat tedious, as building the necessary hierarchy involves iterating the collection, creating view instances, handing models to views, storing the view instance and later destroying the view instances in order to avoid memory leaks and clean up view zombies.

Rather than go through all of the trouble to do this ourselves, we can again use MarionetteJS to handle the bulk of the work for us. In this case, we'll use a more than one of built-in View types that Marionette provides:

  • A CompositeView to render an individual book category, and the list of books within the category
  • A CollectionView to render the list of categories
  • An ItemView to render each individual model from the collection

The HTML templates that we need for this setup are quite simple compared to the JavaScript that will be written. We only need two templates: one for the category view, which is used to create the panels; and one for the book view, which displays the book information.

<script type="text/html" id="book-view-template">
    <div><strong>Title:</strong> <%= title %></div>
    <div><strong>Author:</strong> <%= author %></div>
</script>

<script type="text/html" id="category-panel-template">
    <span><%= name %></span>
    <div class="book-list"></div>
</script>

<div id="placeholder"></div>


The JavaScript is more involved, though. We need to build a Marionette.CollectionView that will render the list of categories as <li> tags in to a <ul> for the PanelBar to use. Each of the category views will be populated with the #category-panel-template which contains a <span> that becomes the title of the panel, and a <div> which becomes the contents of the panel. Within the panel's contents, then, we need a book view that will render the information for each Book model.

// View Definitions
// ----------------

// Define an Book View to render the individual book
var BookView = Marionette.ItemView.extend({
    className: "book",

    template: "#book-view-template"
});

// Define a Category View which will render the book
// Categories as panels, rendering the collection of book
// for each category within that panel.
//
// A Marionette.CompositeView is a view that can render
// both a model with template, and a collection of models
// that get placed within the rendered template.
var CategoryView = Marionette.CompositeView.extend({

    // the HTML tag name for this view
    tagName: "li",

    // the template to render for the category
    template: "#category-panel-template",

    // the view type to render for the collection of books
    itemView: BookView,

    // where to place the list of books, within the rendered template
    itemViewContainer: ".book-list",

    initialize: function(){
        // get the list of books for this category and assign it to
        // this view's "collection" so that it will render as the
        // specified itemView instance
        this.collection = this.model.books;
    }

});

// Define a Category List view that will render the 
// collection of categories as CategoryView instances
var CategoryListView = Marionette.CollectionView.extend({

    // render each model in to a category view
    itemView: CategoryView,

    // tell to to render a "ul" tag as the wrapper
    tagName: "ul",

    // after it's all rendered and has been added to the DOM,
    // initialize the KendoUI PanelBar
    onShow: function(){
        this.$el.kendoPanelBar({
             expandMode: "single"
        });
    }

});


// Model And Collection Definitions
// --------------------------------

// Define a Book model to hold info about books
var Book = Backbone.Model.extend({});

// Define a collection of books
var BookCollection = Backbone.Collection.extend({

    // tell it to use the Book as the type of model
    model: Book

});

// Define a category model to hold a collection of books
var Category = Backbone.Model.extend({});

// Define a category collection to hold a list of categories
var CategoryCollection = Backbone.Collection.extend({
    model: Category 
});

// Book And Category Data Structure And Instances
// ----------------------------------------------

var scifiBooks = new BookCollection([
    { 
        id: 1,
        title: "Neuromancer",
        author: "William Gibson",
    },
    {
        id: 2,
        title: "Snow Crash",
        author: "Neal Stephenson"
    }
]);

var scifiCategory = new Category({name: "Science Fiction"});

// attach the scifi books to this category
scifiCategory.books = scifiBooks;


var vampireBooks = new BookCollection([
    {
        id: 3,
        title: "Abraham Lincon: Vampire Hunter",
        author: "Seth Grahame-Smith"
    },
    {
        id: 4,
        title: "Interview With A Vampire",
        author: "Ann Rice"
    }
]);

var vampireCategory = new Category({name: "Vampires"});

// attach the vampire books to the category
vampireCategory.books = vampireBooks;


// build a collection of categories
var categories = new CategoryCollection([scifiCategory, vampireCategory]);


// Application Initialization
// --------------------------

var categoryListView = new CategoryListView({
    collection: categories    
});

var region = new Marionette.Region({
    el: "#placeholder"
});

region.show(categoryListView);​

The result of this code can be viewed in this JSFiddle.

This example is hard-coding the data and structure to be used for the collection of book categories, and books. A production system would generally load this information from a back-end data source and use one of many available Backbone plugins to build the model and collection hierarchy. The use of MarionetteJS, though, would generally remain the same as it provides a significant reduction in the amount of code that it takes to produce a hierarchical rendering of data.

For more information on using Backbone.Model and Backbone.Collection, building hierarchies with these, and more, see the following resources:

KendoUI, Backbone And DOM Dependency/Independency

Understanding the difference between DOM dependent and DOM independent controls is critical to integration with Backbone. Equally as important, though, we need to understand how and when a Backbone.View is attached to the DOM so that we can determine the most appropriate time to call any DOM dependent code. We've seen example of the Menu control, Splitter control and PanelBar so far, showing examples of how to integrate a DOM independent and dependent widget in to a Backbone.View. But what about the remaining Kendo widgets and controls? It would be nice to know which of them are DOM dependent and which are DOM independent.

From my experience with Kendo, I think it's safe to say that most of them are DOM independent. I've successfully used many of the controls without having to display the contents in the DOM first. This obviously isn't true of all controls, though, and may even change within a given control, depending on the options used. The use of a separate method on the view to set up the DOM dependent code makes it easy to get the widgets to work correctly, and the introduction of MarionetteJS reduces the amount of work that we have to do. Given that, I generally take the approach of always putting my widget code in to the onShow method of my view. This prevents me from having to worry about whether or not the view is attached to the DOM or not. Of course, there are exceptions to this, as there are with any development technique. But this should get you up running with Backbone and Kendo pretty quickly.

About the Author
has been an independent consultant, developer, trainer, speaker and author for the last 2 years. Beginning in January of 2013, though, he will be joining the Kendo UI team as a Developer Advocate. He's been slinging code since the late 80’s and doing it professionally since the mid 90's. These days, Derick spends his time primarily writing javascript with back-end languages of all types, including Ruby, NodeJS, .NET and more. Derick blogs at DerickBailey.LosTechies.com, produces screencasts at WatchMeCode.net, tweets as @derickbailey and provides support and assistance for JavaScript, BackboneJS, MarionetteJS and much more around the web.

Kendo UI & Google Present: Building Chrome Packaged Apps

$
0
0
We have been working with Google on its Chrome Packaged Apps for some time now and we have documented quite a few tricks to share with developer community on how to create and deploy their own apps. Armed with this knowledge, next Wednesday, December 5th, we are taking the first step on the mission to make you successful right from the start.  Together with our friends from Google we are bringing you an event to learn the basics of Google Packaged Apps, the new APIs and security restrictions, and the techniques for using Kendo UI to build your first Packaged App quickly and easily.


Chrome Packaged Apps enable developers to create powerful, standalone apps using HTML, JavaScript, and CSS, giving code the ability to do things never before possible in the confines of a browser. Combined with Kendo UI, our complete front-end framework for HTML and JavaScript developers, rich, cross-platform apps can quickly and easily be created.

Register for the webinar and ten lucky attendees will get a chance to win one of 10 Samsung Chromebooks -- all ready for you to develop Google packaged apps!

  • Who:   Google Developer Advocate, Paul Kinlan
              Kendo UI Developer Advocate, Burke Holland
  • What:   “Building Chrome Packaged Apps with Kendo UI”
  • When:  Wednesday, December 5, 2:00pm ET/11:00am PT
  • Where: Online. Register here and don’t miss out!


About the Author
is a Marketing Director at Telerik and is based in Toronto, Canada. A geek at heart, Sasha works with HTML and JavaScript developers worldwide and loves learning from passionate people. You can follow Sasha on Twitter @k_sasha.


The Facts On Using Kendo UI With ASP.NET WebAPI

$
0
0

In the past few months we've seen a few questions about using Kendo UI with Microsoft's ASP.NET WebAPI which is now a built-in part of MVC 4. The gorilla in the room is "Does Kendo UI Work With WebAPI?".

The answer is of course a resounding "YES!".

Kendo UI itself is engineered towards open web standards and does not cater to a specific technology stack. It is agnostic of what your server is doing and in the end, really just wants you to provide it with a healthy diet of JSON data. How you choose to deliver that data is up to you.

You have a cornucopia of options when it comes to using ASP.NET to return JSON data in a RESTful fashion. It’s all one ASP.NET as Scott Hanselman is fond of saying, but that doesn’t change the fact that all the choices, acronyms and technologies can get really confusing. Essentially, you can get your data as JSON using any of the following:

  • ASP.NET WebForms (Page Methods)
  • ASP.NET MVC
  • ASP.NET WebAPI
  • ASP.NET WCF

All of those are capable of returning JSON data via a URL, which is precisely what you want when building HTML5 applications. The most commonly used of these for creating RESTful services is probably ASP.NET MVC. Just when we were all becoming comfortable with MVC, WebAPI showed up. WebAPI allows you to more easily adhere to a RESTful schema with your URL’s and is very closely related to ASP.NET MVC.

Let’s take a closer look at both ASP.NET MVC, and WebAPI to identify some of the differences between the two. You have several options comes to using it with each of these with Kendo UI.

ASP.NET MVC And Kendo UI

When you are working with ASP.NET MVC, you have two choices. One is to use straight Kendo UI JavaScript, and the other is of course to use the MVC Server Wrappers.

Using Kendo UI JavaScript With MVC

If you decide to use the Kendo UI JavaScript libraries directly, returning JSON is simple. You just need to defined a controller method and call this.Json on your return result. Provided .NET can serialize your response, this is all there is to it. Usually, you have a view model that you return in a collection since .NET cannot serialize LinqToSQL or EF objects.

Returning JSON From an MVC Controller

[HttpGet]
public JsonResult Get()
{
    var albums = _entities.Albums.Select(a => new Models.Album {
        AlbumId = a.AlbumId,
        ArtistId = a.ArtistId,
        GenreId = a.GenreId,
        Title = a.Title,
        Price = a.Price,
        AlbumArtUrl = a.AlbumArtUrl
    });

    return this.Json(albums, JsonRequestBehavior.AllowGet);
}


Now you could create a simple grid with a small bit of JavaScript.

Simple Kendo UI Grid

<div id="grid"></div>

$(function() {
    $("#grid").kendoGrid({
        transport: {
            read: "Albums/Get"
        }
    });
});


That's all well and good, but of course this starts to get a bit more complicated when we talk about sending parameters over to the controller method to do things like paging, sorting, aggregating and the like. You can parse the parameters out of the Request object, or you can create your own custom DataSourceRequest class and let MVC ParameterBinding take over. Assume you decide to turn on paging for the server to handle.

Turn On Paging In The Grid

<div id="grid"></div>

$(function() {
    $("#grid").kendoGrid({
        dataSource: {
            transport: {
                read: "Albums/Get"
            },
            pageSize: 10
            serverPaging: true
        },
        pageable: true
    });
});


When the grid loads, the DataSource will automatically make a request to the server (unless you have autoBind: false) and send along some parameters for paging. Let’s have a look into what a request with paging looks like.

http_request

In that capture, I have outlined the request URL and you can see that the query string has some parameters in it that I’ve highlighted as well. These are the parameters that we need to apply to the query on the server before returning the data.

Let's parse out these parameters. We're doing a GET so we can pluck them right off the query string without any trouble. Then we can apply them to the LINQ query after adding an OrderBy as EF requires this before doing a Skip.

Get Parameters Out Of The Request

[HttpGet]
public JsonResult Get()
{
    var take = string.IsNullOrEmpty(Request.QueryString["take"]) ? 1000 : Convert.ToInt32(Request.QueryString["take"]);
    var skip = string.IsNullOrEmpty(Request.QueryString["skip"]) ? 1000 : Convert.ToInt32(Request.QueryString["skip"]);

    var albums = _entities.Albums.Select(a => new Models.Album {
        AlbumId = a.AlbumId,
        ArtistId = a.ArtistId,
        GenreId = a.GenreId,
        Title = a.Title,
        Price = a.Price,
        AlbumArtUrl = a.AlbumArtUrl
    }).OrderBy(a => a.AlbumId).Skip(skip).Take(take);

    return this.Json(albums, JsonRequestBehavior.AllowGet);
}


That's already a bit messy. We have to check for the existence of the parameters on the Request, handle them if they are null, cast to the appropriate type and set default values.

The other option is to create a custom class which MVC will use to map the parameters that the grid just tossed over the fence.

Custom DataSourceRequest Class

public class DataSourceRequest
{
    public int Take { get; set; }
    public int Skip { get; set; }

    public DataSourceRequest()
    {
        // default values
        Take = 1000;
    }
}


This is much nicer as now we can just map the request coming in. All the type conversion and nulls will be handled by ASP.NET. You can see that I set a default value for the Take in the constructor. Now we just need to specify that our request coming in will be of type DataSourceRequest (this class that we just created).

Use DataSourceRequest With Get

[HttpGet]
public JsonResult Get(Models.DataSourceRequest request)
{
   var albums = _entities.Albums.Select(a => new Models.Album {
        AlbumId = a.AlbumId,
        ArtistId = a.ArtistId,
        GenreId = a.GenreId,
        Title = a.Title,
        Price = a.Price,
        AlbumArtUrl = a.AlbumArtUrl
    }).OrderBy(a => a.AlbumId).Skip(request.Skip).Take(request.Take);

    return this.Json(albums, JsonRequestBehavior.AllowGet);
}


This is cleaner. But the problem still isn't completely solved. You also need a class which will return a result that includes the total count of records for the grid. You can create this class as well, but you are watching your plumbing code grow on the server. Additionally, doing sorting and filtering in LINQ queries gets TOUGH (to put it mildly) when you are dealing with dynamic values. LINQ is no good at this. While there is the Dynamic LINQ library, you are going to have to extend it further to get everything to work.

Lucky for you, our own head of engineering has already put this together for you in a complete downloadable package with samples. This contains everything that you need for mapping in requests and applying them to your queries. I highly suggest you download this project and have a look at the QueryableExtension.cs class, as well as the Sort.cs and Filter.cs classes. This is an excellent resource where you will find everything you need to implement the appropriate structure for communicating seamlessly with Kendo UI.

However, the cleanest option when using MVC is of course the ASP.NET MVC Server Wrappers.

The Server Wrappers. Way More Than Just HTML Helpers.

The ASP.NET MVC Server Wrappers are engineered with the sole mission of tailoring Kendo UI to ASP.NET MVC and providing you with all the necessary server parsing and querying wrapped up in a nice DLL. The first time that I saw Carl Bergenhem demo the MVC Wrappers I was completely blown away that anything could be that easy. Let's take the example from above. First we use the Html Helpers to construct the grid. I can go ahead and make it pageable, sortable and filterable.

Use Kendo UI Html Helpers To Create The Grid

@(Html.Kendo().Grid()
    .Name("grid")
    .DataSource(dataSource => dataSource
        .Ajax()
        .Read(read => read.Action("Get", "Albums"))
    )
    .Pageable()
    .Sortable()
    .Filterable()
)


Now what do we have to implement in the controller to handle all the filtering, sorting and paging? Here is the complete code.

Handle Request From Kendo UI

public ActionResult Get([DataSourceRequest]DataSourceRequest request)
{
    var albums = _context.Albums.Select(a => new Models.AlbumModel
    {
        AlbumId = a.AlbumId,
        ArtistId = a.ArtistId,
        GenreId = a.GenreId,
        Title = a.Title,
        Price = a.Price,
        AlbumArtUrl = a.AlbumArtUrl
    });

    return this.Json(albums.ToDataSourceResult(request));
}


That's IT. No parsing parameters. No dynamic linq queries. No pain.

The DataSourceRequest object maps the parameters for you and then the uber convenient ToDataSourceResult applies these parameters to your query. There is an underlying LINQ engine that Kendo UI uses to do this and it abstracts away all of the manual burden in communicating constraints to your database from Kendo UI. There is no faster way to get up and running with Kendo UI on ASP.NET MVC then with the server wrappers.

What About WebAPI?

WebAPI hit production status this year and showed up in MVC 4. It's an elegant way to expose your data very RESTfully while letting MVC handle the actual returning of your views. It seems like the Kendo UI extensions should "just work"® in a WebAPI controller, but due to some core differences in between ASP.NET MVC and WebAPI, they require a bit of tweaking.

MVC vs WebAPI Parameter Binding

WebAPI controllers are different than MVC controllers in many ways, not the least of which is the way that they do Parameter Binding. If you want to know the nuts and bolts of it, read this article. For the purposes of this post, just know that WebAPI does NOT do model binding against the request body by default whereas MVC does. This is what Kendo UI is expecting to happen on the server. This means that the DataSourceRequest is not going to be fully operational out of the box with WebAPI. For instance, should you turn on paging and sorting, the Take and Skip parameters will be populated in the DataSourceRequest, but the Sorts collection will not.

To work around this, we have provided a custom ModelBinder for the DataSourceRequest. All you need to do is add it to your application and you will get support for WebAPI the same way that you would in an MVC Controller. You can find this ModelBinder in a full project showing how to use it with WebAPI in the Kendo UI Code Library.

Now you might wonder why this isn't included in the default Kendo UI For MVC Distribution. This was something that was discussed internally and it was determined that at least for now, the best choice is for us to offer this class separately as including it automatically would cause a fracture in the DLL's required for MVC 3 vs MVC 4, further complicating the install and use of the extensions.

OData And WebAPI: The Plot Thickens

Adding more complexity to this discussion is OData and how it factors into the WebAPI topic. ASP.NET MVC does not support OData out of the box and and Kendo UI MVC Wrappers negate it's necessity since they have the DataSourceRequest and ToDataSourceResult, which provide the same functionality. When discussing OData, we do it in the context of WebAPI.

First off, lets define exactly what OData is. OData is the "Open Data Protocol". A standard proposed by Microsoft that specifies how parameters should be formatted to work across API's. In other words, if everyone implemented OData support, you wouldn't have to trapse through API documentation to figure out how to do pagination. You would just send the $take and $skip parameters in the query string.

This is really a very good idea. While you may only be concerned about your own API or application, it would be really nice if we were all implementing these things the same way. Kendo UI fully supports OData.

WebAPI on the other hand, does not. It's getting better and is currently implemented via this NuGet Package. The point of OData support in WebAPI is that you shouldn't have to manually parse the parameters off the HTTP request body or query string. WebAPI should apply them to your query automatically. This means that you could use the Kendo UI JavaScript and send some OData over for paging where WebAPI should handle everything for you.

Simple Grid

$("#myGrid").kendoGrid({
    dataSource: {
        transport: {
            read: "api/albums",
            type: "odata"
        }
    }
})


Adding the "Queryable" declaration to your method should magically apply the parameters to your query.

Queryable Method Applies Parameters

[Queryable]
public IQueryable Get()
{
    db.Configuration.ProxyCreationEnabled = false;

    var albums = _context.Albums.Select(a => new Models.AlbumModel
    {
        AlbumId = a.AlbumId,
        ArtistId = a.ArtistId,
        GenreId = a.GenreId,
        Title = a.Title,
        Price = a.Price,
        AlbumArtUrl = a.AlbumArtUrl
    });

    return albums;
}


The partial support in WebAPI for OData makes this quite a bit more complicated. Jeff Valore wrote an excellent article on how to make Kendo UI work with the partial OData support that I highly suggest reading. For the sake of centralizing all the information on this subject, I'll go over it again here.

$inlinecount And $format - Wherefore Art Thou?

The crux of this issue is that the $inlinecount and $format parameters are not supported yet in WebAPI. Instead of ignoring these parameters, WebAPI will error on them. To further complicate things, WebAPI does not support JSONP in the context of OData which is what Kendo UI sends by default as per the OData 2.0 standard. Jeff shows how to make your request plain JSON and remove the unsupported parameters using parameterMap method on the DataSource, but then add their values back dynamically so that everything keeps on working smoothly like butter.

Remove $inlinecout and $format

// select my grid and turn it into a kendo ui grid
$("#myGrid").kendoGrid({
    dataSource: {
        serverFiltering: true, // <-- Do filtering server-side
        serverPaging: true, // <-- Do paging server-side
        type: 'odata', // <-- Include OData style params on query string.
        transport: {
            read: {
                url: "/api/albums", // <-- Get data from here
                dataType: "json" // <-- The default was "jsonp"
            },
            parameterMap: function (options, type) {
                var paramMap = kendo.data.transports.odata.parameterMap(options);

                delete paramMap.$inlinecount; // <-- remove inlinecount parameter.
                delete paramMap.$format; // <-- remove format parameter.

                return paramMap;
            }
        },
        schema: {
            data: function (data) {
                return data; // <-- The result is just the data, it doesn't need to be unpacked.
            },
            total: function (data) {
                return data.length; // <-- The total items count is the data length, there is no .Count to unpack.
            }
        }
    });

});


Now you may think to yourself at this point "That's a lot of manual intervention for something that should just work.". We completely agree! Are there other options? Yes.

There are ways for you to add missing OData support to WebAPI should you be so inclined.

The other option that you have that might better suit your situation is to use the new WCF Data Services which do fully support OData.

WCF Data Services 5.1

Jeff posted a really good walkthrough on this one over on his own blog.

What Jeff points out is that you can use WCF services in your MVC/WebAPI project. Why not? It's all the same ASP.NET in the end right? In fact, the new Awesome Sauce Music Store Example uses a combination of ASP.NET MVC AND WCF. The WCF Data Services have remarkably better support for OData and Jeff's article will show you in detail how to implement it with Kendo UI.

Plain JSON And Kendo UI

Of course, should you choose to, you can always just use plain JSON with MVC/WebAPI and Kendo UI. WebAPI is really good when it comes to sending and receiving plain JSON and so is Kendo UI!

In the case of passing parameters from Kendo UI To WebAPI using plain JSON, you are in pretty much the exact same boat as you are with MVC Controllers. You can pop them off manually, or you can create a custom class which maps for you. You are still faced with manually applying them to your query either with giant switch statements or hopefully with a more flexible solution like the Dynamic LINQ Library.

If you like to roll this way, then we have you covered with tutorials and screencasts on exposing your data as JSON, consuming it with the grid, and then implementing sorting on the server.

Have It Your Way

What all these choices really give you is a TON of flexibility and the chance to do it the way that you want to. This is nice, but sometimes it's nicer to know exactly what you should do instead of having to try and make a decision based on a number of factors. Let's sum it up like this:

Your Choices When Using Kendo UI With ASP.NET


Use Kendo UI With ASP.NET MVC / WebAPI And Plain JSON

Pros

  • MVC, WebAPI and Kendo UI all understand and serialize JSON just fine
  • No additional dependencies are required

Cons

  • Parameters must be manually parsed and casted to the appropriate type in the controller method
  • Dynamic parameters in LINQ queries can be a pain to implement


Use Kendo UI MVC Wrappers With ASP.NET MVC Or WebAPI

Pros

  • Helpers construct UI elements giving you strong typing and Intellisense
  • Parameters are mapped automatically and applied to your query all by Kendo UI

Cons

  • You lose granular control over your controller methods and LINQ queries
  • When using WebAPI, a nominal amount of work is required from you to implement additional code


Use Kendo UI With ASP.NET WebAPI And OData

Pros

  • WebAPI allows you to create clean and beautiful RESTful URL's
  • You can separate API logic and view logic between MVC controllers and WebAPI controllers
  • OData replaces the need for the MVC Server Wrappers in the sense that it maps and applies parameters for you

Cons

  • The OData support in WebAPI is subpar right now and requires this NuGet package coupled with some creative hacks to make it work
  • The lack of support in OData requires more configuration on your part


Use Kendo UI With ASP.NET WCF And OData

Pros

  • WCF has really great support for OData
  • Jeff has a post that explains how to make it work
  • You don't have to do any hacking or coersing to make it function

Cons

  • WCF is not as "hip" as WebAPI or ASP.NET MVC (note: this is might be the worst reason not to choose something)
  • WCF can be more verbose than WebAPI
  • Some configuration is required


It’s All JSON In The End

It’s easy to forget in all of this that at the end of the day, all you are really doing is sending parameters to the server, and then sending some JSON data back based on the constraints given to you by Kendo UI and applied to your data.

Also remember that we have the following samples and tutorials to help you out:

Getting Started With The MVC Wrappers

Sample Project For Using Kendo UI ASP.NET MVC Wrappers With WebAPI

Using Kendo UI With WebAPI (Plain JSON)

Using Kendo UI With WebAPI (OData)

Sample Project For Using Kendo UI With MVC, WCF, ASMX and Page MethodsUsing Kendo UI With WCF (OData)

Clearly what you choose will depend on your particular situation and needs. I realize this article really expanded beyond the scope of just "Kendo UI With WebAPI", but it's really important to at least know what all the options are. There is no one "right" way to do things, and you are free to mix and match these as you see fit. Use MVC with WebAPI, WCF with MVC, or MVC With WebForms. It's all one big happy ASP.NET!

About the Author
is a web developer living in Nashville, TN. He enjoys working with and meeting developers who are building mobile apps with jQuery / HTML5 and loves to hack on social API's. Burke works for Telerik as a Developer Evangelist focusing on Kendo UI. Burke is @burkeholland on Twitter.


Using Adobe Edge Tools and Services with Kendo UI

$
0
0

Several months ago Adobe announced a number of products under the name of Edge Tools and Services. Some of these included new names on existing projects you may already have heard of like Shadow which became Edge Inspect and Brackets which saw a branded release under the name of Edge Code. Others were already quite well known and widely used such as Edge Animate (formerly just Edge), Typekit and PhoneGap Build. Still others were brand new including Edge Web Fonts which is already freely available and Edge Reflow which was previewed but has not yet been released publicly.

One thing that all these tools have in common is that they are all lightweight and focused on a particular task. This means you don’t need to buy into a full stack solution or monolithic IDE, but can pick and choose the tools that fit best into your particular workflow. In this article, we’ll take a look at one such potential workflow. We’ll assume I am building a Kendo Mobile app using Brackets (or Edge Code) for our HTML, CSS and JavaScript coding, then Edge Inspect for some multi-device testing, and finally PhoneGap Build creating device-specific apps.

Coding with Brackets (Edge Code)

Brackets is a lightweight code editor for HTML, CSS and JavaScript. There are a lot of lightweight code editors on the market, but Brackets has some features that make it unique.

Brackets is entirely open source, licensed under the MIT license, and available on Github. It is built upon web technologies which not only means that if code HTML, CSS and JavaScript, you can contribute to Brackets but also means you can edit Brackets with Brackets. More importantly, it is highly extensible using these same technologies, meaning you can customize your code editor using the web technologies you know and love (if you want to learn how, this article will teach you). There are even a good number of extensions already available, built both by the community and Adobe.

Let me briefly explain the difference between Brackets and Edge Code. Edge Code is a branded release of the Brackets open source project that is available with a free Creative Cloud subscription. It, therefore, includes all the same features but also comes with some pre-loaded extensions that integrate with Adobe tools and services. Future Edge Code releases will continue to expand upon this integration.

If we’re building a Kendo mobile application, we can leverage some additional features in Brackets. One of the things about developing apps with HTML, CSS and JavaScript for the browser is that you constantly end up switching from your HTML file to one or several of your CSS files then to one or several JavaScript files and finally to the browser and refresh. All of this, just to make even a simple change to your page. Brackets helps ease that process a bit with two features, one called Quick Edit and the other Live Development.

Quick Edit is a feature that allows you to get access to and edit relevant CSS classes and JavaScript functions without ever having to leave your HTML file. As you can see in the screenshot below, if I place my cursor on the header block in my Kendo Mobile document, then hit ctrl/cmd+E, Brackets will open a Quick Edit view that displays to me any classes across my project’s CSS files that could apply to this element, including custom CSS classes as well as built-in Kendo Mobile styles, and I can simply edit them inline. Similarly, if I had a JavaScript function call, use Quick Edit to view the relevant function in my JS files.

edge_code

Live Development is a feature that also saves you from repetitive tasks and improves the development workflow. With the Live Development feature turned on, any edits that I make in my CSS will immediately be visible within my Chrome browser window, without refreshes or even saving the file I am editing. This allows you to see the effect of style changes you are making live, as you code them. Changes to HTML will become visible within my Chrome browser as soon as they are saved, also without requiring a brower refresh.

Testing with Edge Inspect

Now that we have our Kendo Mobile app working in our desktop browser the way we want, it is time to do some real testing on devices. Typically, my process might be a painful one of ensuring the page is at a URL accessible by my devices, loading the page on each device, testing, fixing issues, unlocking each device, refreshing each browser and retesting. This tedious and cumbersome process might repeat itself countless times until I finally have everything looking and functioning just how I want it. What if instead I could test on all the devices at the same time without needing to worry about unlocking, entering the URL or refreshing?

Adobe Edge Inspect, formerly known as Adobe Shadow, allows just that. Edge Inspect has three pieces: a desktop application which must be running for the system to work; a Chrome extension and an app currently available for iOS and Android. With all three pieces running, all of my connected devices will follow along as I browse within Chrome, even switching URL’s as I change tabs and also able to access my localhost without any special setup. For example, in the screenshot below, you can see that I have an iPad, Motorola Xoom and Galaxy Nexus all connected to Edge Inspect.

However, I can go beyond simply browsing the page. Edge Inspect uses weinre to allow me to actually debug the page, accessing and modifying the HTML and CSS on each device and viewing the console as I might via the Chrome Developer Tools.

In addition, I can request screenshots of each connected device along with some metadata about each screenshot. As you can imagine, this be a valuable tool for any QA team.

Edge Inspect, like Edge Code, is also available with the free Creative Cloud subscription, though some of the features including connecting multiple devices at once and requesting screenshots due require a paid subscription.

Building with PhoneGap Build

Obviously, if you want to build a browser-based Kendo Mobile application, we’re good to go at this point. But what if we wanted to access features on the device that cannot reliably be accessed via mobile browsers yet, or if we wanted to monetize our application via the various app marketplaces?

PhoneGap is a solution that has been around for some time to solve that problem, providing a bridge between my app built with web technologies and the various device API’s that cannot yet be accessed via HTML and JavaScript, as well as offering a way to package these applications for release on the app stores. While PhoneGap let me target a number of device platforms with, for the most part, a single codebase, setting up my environment to build for all these platforms wasn’t always the most accessible process. PhoneGap Build, however, makes turning your HTML, CSS and JavaScript applications into native mobile applications incredibly easy.

PhoneGap Build is a cloud service that will create the builds for various platforms for you. There is no complex environment to set up on your machine; you can use any coding environment that is comfortable for you to create the HTML and simply upload it to the PhoneGap Build service, or connect it to your GitHub repository or even use the integration available for Brackets and Edge Code or Dreamweaver. Plus, you can still take advantage of all the device API’s PhoneGap supports by default as well as a curated set of plugins. There’s even an API you can tie into if you want to integrate build into your own build process.

Of course, you should always keep in mind why you are creating an app versus running in the browser, ensuring you are providing some benefit or feature that enhances the user’s experience. But getting started building Kendo Mobile based apps is easy and, in fact, Kendo’s very own Burke Holland has an excellent tutorial on how to do just that.

Where to Go From Here

While I have focused on an entire workflow based around a number of Edge Tools and Services (and even skipped over a few), my point wasn’t to sell you on a comprehensive solution where you need to completely remake your own workflow. If you want to, by all means, all of the tools should work well within your environment (and with the Kendo frameworks). But the key takeaway here should be that each of these tools fills a very specific need and can integrate into and hopefully improve your existing workflow.

About the Author
is a Content and Community Manager for the Adobe Developer Center team, where he helps drive content strategy for HTML5, CSS, JavaScript and mobile content. Brian blogs regularly and is a unreformed twitter addict. He is a frequent author and speaker.

Desktop Apps: The Final Frontier for HTML5

$
0
0

If I’ve said it once, I’ve said it a thousand times: HTML5’s primary advantage is reach. It runs everywhere.

It’s on the back of this lone competitive advantage that HTML5 has radically transformed the software development landscape and found its way in to everything from modern websites to mobile apps. With the focus on making HTML, JavaScript, and CSS fully capable languages, designed to meet the needs of modern app development, and with runtimes racing for the performance crown, HTML5 has ushered in a new era of “write once(ish), run everywhere.”

And unlike the plug-in dependent attempts at this in the past (Java, Flash, Silverlight), HTML5 looks like it actually has the right stuff to fulfill this long desired software capability. It also has the right industry support, with investment from all of the major tech players: Google, Microsoft, Apple, Amazon, Adobe, Mozilla, SAP, Oracle, HP, and even Facebook.

It’s ironic, then, that in all of this progress, one of the few places we don’t find major use of HTML5 to build apps is on the desktop!

Sure, browsers run on the desktop, and there are plenty of web apps using HTML5 to deliver experiences via the browser. But browsers are a “shell” full of implied meaning. Any app run in a browser automatically triggers all of an user’s expectations about how browsers work: back button, history, links, address bars, and so on.

It’s time to break free from the “browser” and use HTML5 to build modern desktop apps. The desktop has become the (first) and final frontier for HTML5 to show its usefulness.

Enter Chrome Packaged Apps

HTML5 takes another huge step forward with Chrome Packaged Apps. Packaged Apps open-up the desktop to HTML5 developers. Reusing all of the skills mastered for the web and mobile, Packaged Apps empowers developers to create complete app experiences that can be run anywhere you find Chrome: Windows, Mac, Linux, and, of course, Chrome OS!

These apps do not run in a “browser.” They run as independent, standalone apps with their own shell. Chrome powers the entire experience, but for users, Packaged Apps are not a browser experience. They’re an app experience.

Put succinctly, Packaged Apps enable an experience as capable as a “native” app, but as safe as a web page. They’re cool, and at Kendo UI, we’re really excited about the possibilities they unlock.

See It In Action: Chrome Camera

This all sounds nice, but what can you really achieve with Chrome Packaged Apps?

We had the opportunity to put Packaged Apps to the test in a recent project conducted for Google. Google wanted a fun camera app for Chrome OS and they turned to Kendo UI to build a Packaged App that showcases the power of the platform and HTML5. The app uses Kendo UI throughout, naturally, and uses many other neat Chrome Packaged App and HTML5 APIs to build a dynamic, rich, app that any user can pick-up and have fun using.

We’re also really proud to say that this app ships by default now on all Chrome OS devices. Pick-up a Chromebook or Chromebox and you’ll see it there. You’ll soon also be able to easily grab this from Google’s app store so you can launch it via any Chrome browser, but here’s a quick video preview of what the app does if you don’t have a Chrome OS device handy:

Remember, it’s all done with HTML, JavaScript, and CSS (including the webcam effects, live previews, image saving, and so on). Is it the most complex app in the world? No. But it does clearly demonstrate how “desktop” app experiences are now possible with Chrome Packaged Apps and powerful frameworks like Kendo UI.

With this one app, I can reach users on Chrome OS devices, Mac, Windows, and Linux directly. And since the foundations of the app are HTML, JavaScript, and CSS, much of the code could be reused to even reach users on other platforms like Windows 8, iOS, and Android.

(Kudos Pause: Special props to @BurkeHolland for his tireless work on Chrome Camera, along with the intrepid developers and designers on Telerik’s Professional Services team!)

Build Your Own App

This is just the beginning. While the Camera app is cool, we really want to see what you can build using Packaged Apps and Kendo UI.

To help you get started, we’re co-hosting a special webcast tomorrow (Wednesday, Dec 5) with Google that will get you ready to build your first Packaged App. Chrome Developer Advocate Paul Kinlan will join Kendo UI Dev Advocate Burke Holland to take you from n00b to hax0r in 60 minutes. We’ll also be giving away 10 Chromebooks to randomly lucky attendees, so don’t miss all the fun and register for the event right now!

Finally, we’ve also compiled a special page on KendoUI.com to help Chrome Packaged App developers. Check it out and stay tuned for even more updates as we work hard to make the lives of Packaged App developers easier.

Conquer the Final Frontier

If you’re already using HTML5 to build websites, web apps, and mobile apps, why ignore it for desktop apps? Conquer the final frontier of HTML5 development and fully realize the benefits of creating software using the same skills for all platforms. Chrome Packaged Apps is a gateway to getting your software in front of users, and Kendo UI is a productivity multiplier in a box, designed to help you build better apps faster.

What do you think? Are you as excited as we are about the possibility of unifying all apps under the HTML5 umbrella? Personally, I can’t wait to start creating apps for Windows, Mac, and Chrome OS using the developer skills I’ve already mastered.

Register for Kendo UI/Google Packaged Apps Webcast (Weds, Dec 5 @ 11:00 AM PST)

About the Author
is an avid HTML5, CSS3, and JavaScript advocate, and geek about all things web development. He is an active speaker and author, helping developers around the world learn and adopt HTML5. Todd works for Telerik as VP of HTML5 Web & Mobile Tools, where his current technical focus is on Kendo UI. Todd is @toddanglin on Twitter.

[Video] Building Chrome Packaged Apps

$
0
0

Were you among the hundreds that joined us yesterday for the Chrome Packaged Apps webcast?

If yes, thanks for joining! We hope you learned something and enjoyed the demos presented by Paul Kinlan (@Paul_Kinlan) and Burke Holland (@burkeholland).

If no, don’t worry! We recorded the entire event and it is now available on YouTube. For background, yesterday Kendo UI and Google joined forces to co-present a webcast focused on building Chrome Packaged Apps with Kendo UI. Google Developer Advocate Paul Kinlan provided an essential introduction to Packaged Apps, and Kendo UI Developer Advocate Burke Holland followed to show you how to begin building your first Packaged App using Kendo UI. It’s everything you need to go from Chrome Packaged Apps n00b to hax0r in 60 minutes.

You can watch the complete event on Kendo UI’s YouTube channel now (or watch the embedded video below).

If you want even more Package App info, don’t miss the new dedicated page on KendoUI.com (kendoui.com/chrome) designed especially for Chrome Packaged App developers (or those interested in the new platform). And if you’re still wondering what’s the big deal about Packaged Apps, be sure to read my recent post, “Desktop Apps: The Final Frontier for HTML5.” Hopefully that will help.

Chromebook Winners

Of course, I know many of you are interested in seeing if you won one of the 10 Samsung Chromebooks we gave away yesterday as part of the webcast. We announced the winners on Twitter, but here again is the full winner list:

  1. Robert Leicht
  2. Dave Verschleiser
  3. Thomas Loach
  4. Rasto Beno
  5. Yosef Kramer
  6. David Preseault
  7. Andrew Ross
  8. Pierre Asselin
  9. Paul Scivetti
  10. Chris Vaughn

Congrats to the luck winners! You should be getting an email directly soon to help you claim your prize.

Thanks again to everyone for participating in this event, and stay tuned for more great Chrome Packaged App events in 2013!

About the Author
is an avid HTML5, CSS3, and JavaScript advocate, and geek about all things web development. He is an active speaker and author, helping developers around the world learn and adopt HTML5. Todd works for Telerik as VP of HTML5 Web & Mobile Tools, where his current technical focus is on Kendo UI. Todd is @toddanglin on Twitter.

Ireland’s leading digital agency saves 75% development time with Kendo UI

$
0
0

We love to showcase our customers' success and Arekibo is certainly one of them.

When FTSE 100-listed CRH plc commissioned Arekibo, Ireland's leading digital agency, to deliver a stand-out investor relations website, the big challenge was always going to be bringing the financial data to life. CRH required a modern investor relations website which would stand out from the crowd, but simultaneously needed to make available historical financial data spanning multiple years. After evaluating a range of technologies, Arekibo chose the Kendo UI framework to deliver a compelling interactive web experience using HTML5 and JavaScript and in the process saved 75% on development time for data presentation by using Kendo UI DataViz. Also, Kendo UI HTML5 controls enabled the CRH site to deliver a consistent interactive experience seamlessly across devices, browsers and platforms. Read more about the challenge Arekibo had, and how we helped solve it.

If you are interested in working with us on a case study, please send us an email with your plans involving Kendo UI-developed apps and sites and we'll choose one every month to be featured in Kendo UI newsletter.

Sasha Krsmanovic

About the Author
is a Marketing Director at Telerik and is based in Toronto, Canada. A geek at heart, Sasha works with HTML and JavaScript developers worldwide and loves learning from passionate people. You can follow Sasha on Twitter @k_sasha.


Announcing the Kendo UI Q1 2013 Roadmap!

$
0
0

Kendo UI’s Q3 release is behind us, and the holidays are upon us. I don’t know about you, but I can’t think of a better way to celebrate than with a roadmap update!

And I’m not talking about just any roadmap, it’s the Kendo UI Q1 2013 roadmap. Consider it an early Christmas present from us, to you.

What makes a roadmap?

Before I dive into the details of the Q1 roadmap, I thought it might be helpful to set the stage with a little background on how we arrive at our roadmap, in the first place. UserVoice is our public forum for customer feedback, of course, but the data contained therein is only one piece of a much larger puzzle to fit together when it comes time to plan for a release. When planning, we gather all of your feedback from UserVoice, as well as relevant data from these sources:

  • Industry research and analysis
  • Direct Customer surveys and feedback
  • Forum and support requests
  • Input from Telerik leadership

With all of this data in hand (and there is a lot of it!) the team gathers to prioritize all relevant requests, create a roadmap for the next few quarters, and establish themes for the current release. Themes categorize much of our focus, while also clearly defining the value we plan to deliver to customers in a given release. Though each release of Kendo UI is full of new features and fixes in our Web, DataViz or Mobile suites, we feel that it’s important to focus our release planning around broad themes that represent the “big rocks” of value we want to provide. Many of these themes align to a single suite, while others affect the framework as a whole. Our key release themes for Kendo UI in Q1 will be:

Server Wrappers for Java and PHP

For our Q3 release, we introduced the beta of Kendo UI Complete for JSP, a set of server wrappers for Java JSP developers. We’re in the process of collecting feedback for our Java Wrappers (and if you’re using our wrappers, please let us know what you think), and are planning to officially deliver them with the Q1 release.

Along with wrappers for Java, I’m excited to announce that Q1 will also mark the delivery of server wrappers for PHP developers! I know that many of you have been patiently waiting for these, and I’m happy to report that the wait will soon be over. Stay tuned for a preview of these with the Beta early next year.

Support for Modern JavaScript Apps

In addition to our server wrappers, we plan to use time in Q1 to address some of the biggest features you’ve been asking for related to the construction of large-scale, modern JavaScript applications. For starters, we’ll be adding support for RequireJS, so if you’re an RJS fan, you’ll be able to easily leverage Kendo UI in your apps.

The other request we get quite often is support for building “Single Page Applications” or SPAs. SPAs are a huge topic, and while there’s nothing stopping you from building SPAs and using Kendo UI in your own apps today, we know that several customers would like to see Kendo deliver full-stack “SPA support,” which we feel means:

  • View Management
  • Routing
  • Client Data Support and Syncing

For Q1, our plan is to deliver an Alpha of a SPA sample implementation. Since SPA is a big topic, and there are lots of directions we can go with this, we’d like to get something in your hands, and gather your feedback before delivering a finalized feature set in a future quarter.

New Chart Types in Kendo UI DataViz

Hot on the heels of the Stock Chart type we added to Kendo UI DataViz in Q3, we’ll be adding some additional charts in Q1, including Sparklines, BulletGraphs and DataBars. We’ll also be dropping in some additional features and interactivity across all chart types, so keep an eye out for our Service Pack and Beta releases early next year!

Windows Phone 8 Support in Kendo UI Mobile

The last major theme is one that I know many of you have been waiting for, and it’s one we’re excited to finally be able to deliver. In Q1, we’ll be adding Windows Phone 8 to our list of target platforms for Kendo UI Mobile. As we’ve said in the past the hurdle for Windows Phone has always been the capabilities of the browser. IE9 on WP7 and 7.5 was missing a lot of critical features we needed to bring Kendo UI Mobile to those devices. With the introduction of IE10 on Windows Phone 8, that hurdle has been cleared and we’re excited to be able to give you the ability to target WP8 with your Kendo UI Mobile applications! We’ll be posting more detail about WP8 support soon, so stay tuned!

The items above are some of our “big rocks” for Q1, but there’s a lot more we’re working on. In addition to these themes, you can expect that we’ll deliver a number of other requested widgets, features and enhancements for Q1 (including new web widgets like multi-select, color picker and tooltip, and ListView search mode in Kendo UI Mobile). For more information about additional features we plan to deliver, head on over to the Roadmap page on KendoUI.com.

The Kendo UI roadmap is a living document. Even though we’re focusing our efforts around the themes I shared here today, we’re always looking to deliver maximum value to our customers with each release. With that in mind, you should consider the public roadmap published at KendoUI.com to be a living document, as well. There’s always a chance that other key and requested features will find their way into our Q1 release, so keep an eye on that space over the coming months.

And as always, we want your feedback! If you’re interested in weighing in on the roadmap moving forward, head on over to our public UserVoice forum to view, comment and vote on ideas, or even add your own. We watch this forum regularly, so don’t hesitate to let us know what you’d like to see in a future release!

Our three 2012 releases were jam-packed with a ton of new features and fixes, but there’s still plenty to be done! Thanks to your feedback, the team has arrived at a roadmap that will make our Q1 release next year even more exciting! Stay tuned as we work to make the best toolkit for building applications with HTML, JavaScript and CSS even better.

Finally, Happy Holidays everyone!

About the Author
(@BrandonSatrom) is Program Manager for Kendo UI and is based in Austin, TX. A unapologetic lover of the web, Brandon loves to talk about HTML, JavaScript, CSS, open source and whatever new shiny tool or technology has distracted him from that other thing he was working on. Brandon loves writing and speaking and loves hanging out with and learning from other passionate developers, both online and in person. He blogs on occasion at UserInExperience.com

Viewing all 181 articles
Browse latest View live